
30+ DIY Christmas Ornaments for a Festive Tree
A tree dressed with ornaments you made yourself has a warmth no shop-bought set can copy, and the best diy christmas ornaments are simple — an orange, a pinecone, a clear bauble, a little time — as these 30+ weekend-makeable ideas show, grouped by material and using supplies from a kitchen drawer, the garden or one craft-shop trip.
Natural & Foraged Ornaments
1. Dried Orange Slice Ornaments: Citrus That Glows
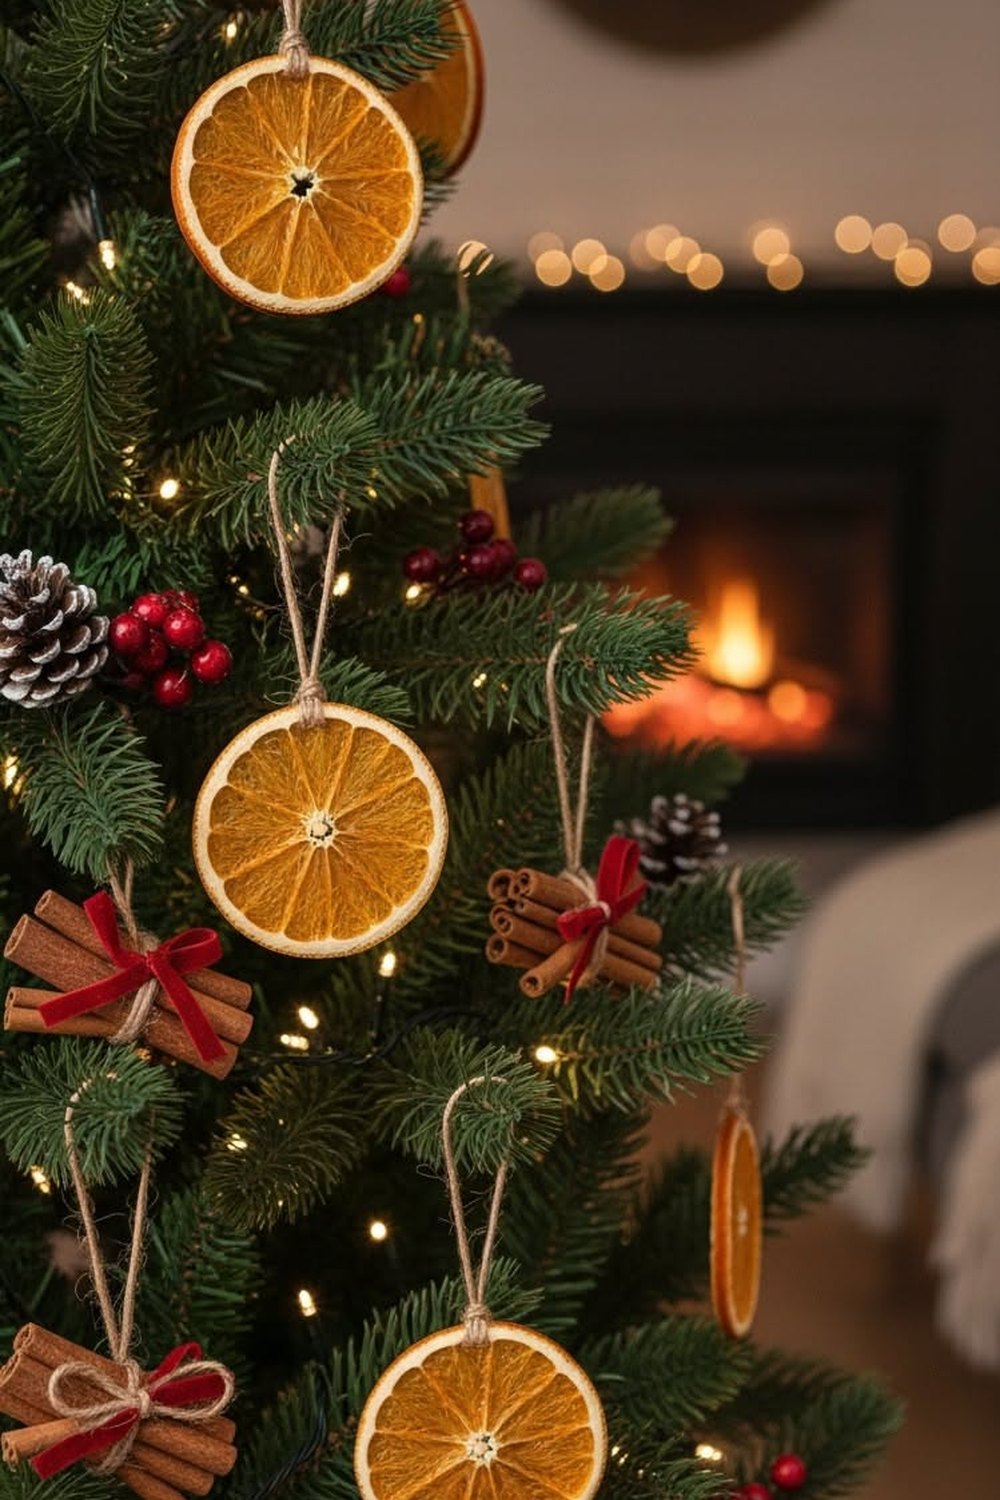
Backlit by the tree lights, a dried orange slice glows like a tiny stained-glass window.
Slice oranges about half a centimetre thick, pat them dry and bake them low and slow until they turn translucent and amber. Thread each slice onto twine with a cinnamon stick or a wooden bead and hang them where the tree lights shine through — that backlit glow is the whole magic, and it costs almost nothing.
Styling tip: dry a double batch in one go. Half can dress the tree and the other half can be threaded into a matching garland for the mantel, so the room tells one story.
2. Cinnamon Stick Bundles: Scent Tied with Twine
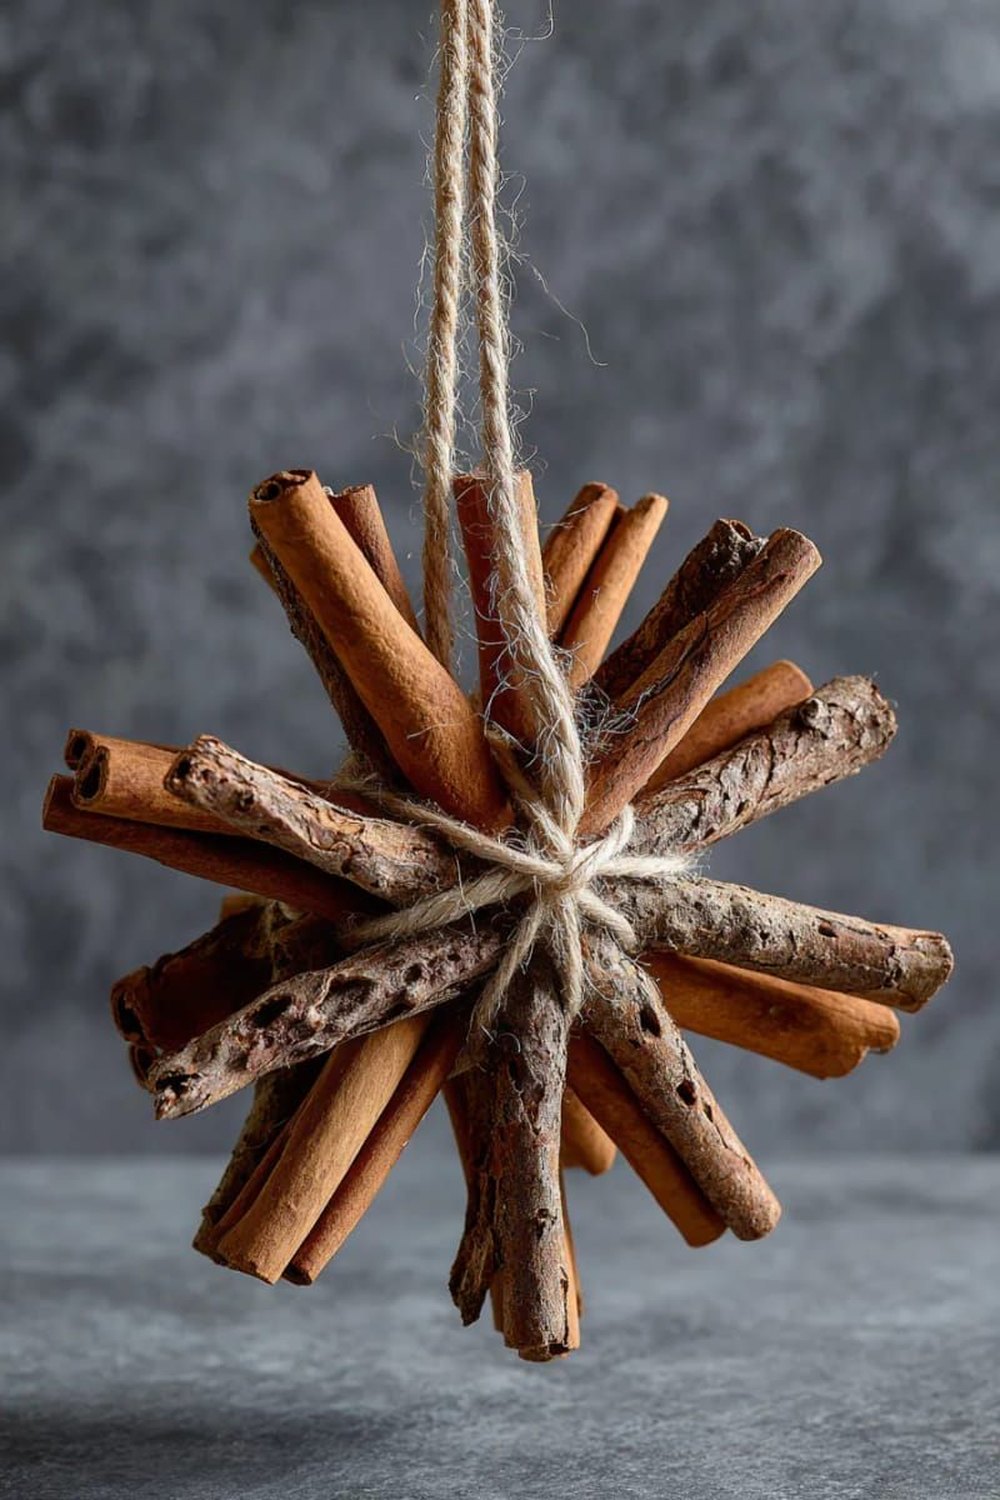
Three sticks and one knot — the ornament that perfumes the whole tree.
Take three to five cinnamon sticks, tie them firmly in the middle with twine or a strip of your tree ribbon, and finish with a star anise or a tiny sprig of greenery glued on top. They take minutes each, look beautifully rustic against green branches, and every time you pass the tree you catch that warm, spiced scent.
Styling tip: hang cinnamon bundles where the lights warm them gently — the soft heat releases the fragrance. Cluster them in twos and threes rather than scattering singles, so they read as a deliberate set.
3. Frosted Pinecone Ornaments: Foraged and Finished
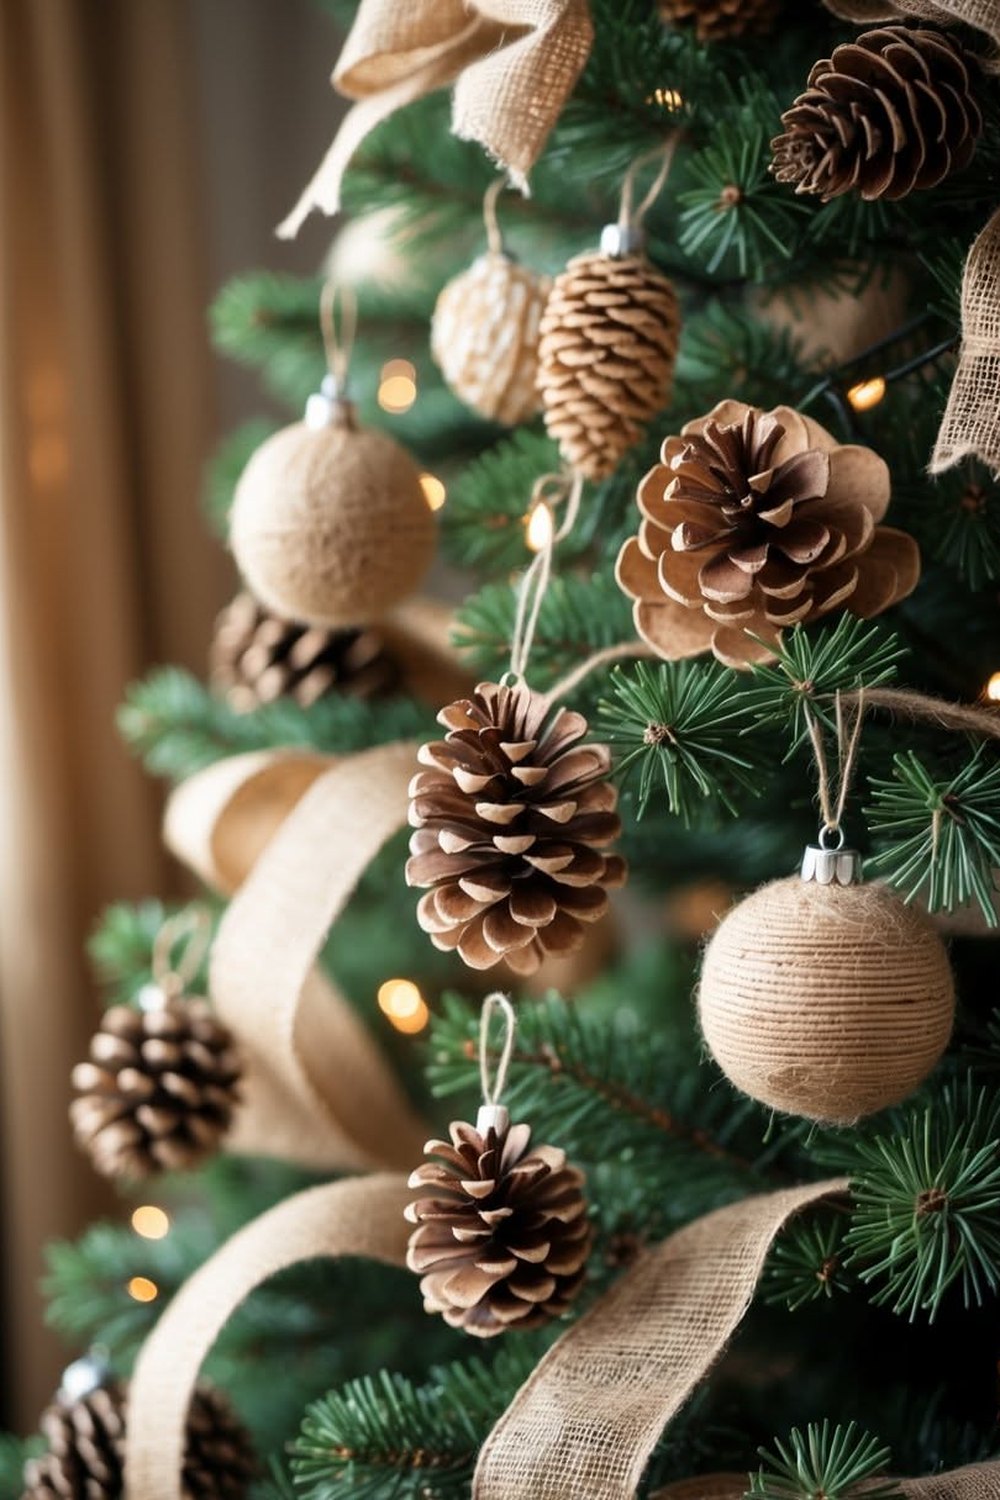
A gathered pinecone, a ribbon loop and a dusting of white — woodland texture for free.
Screw a small eye hook into the top of a gathered pinecone, or hot-glue a ribbon loop in place, then brush just the outer tips with white paint or faux snow for a frosted edge. Hung through the branches, pinecones bring the deep, woody texture that makes the smoother baubles around them look richer.
Styling tip: give foraged cones a short, low bake in the oven before you decorate them — it dries them, opens them fully and makes sure nothing wild comes into the house with them.
4. Wood Slice Ornaments: Plain, Stamped or Painted
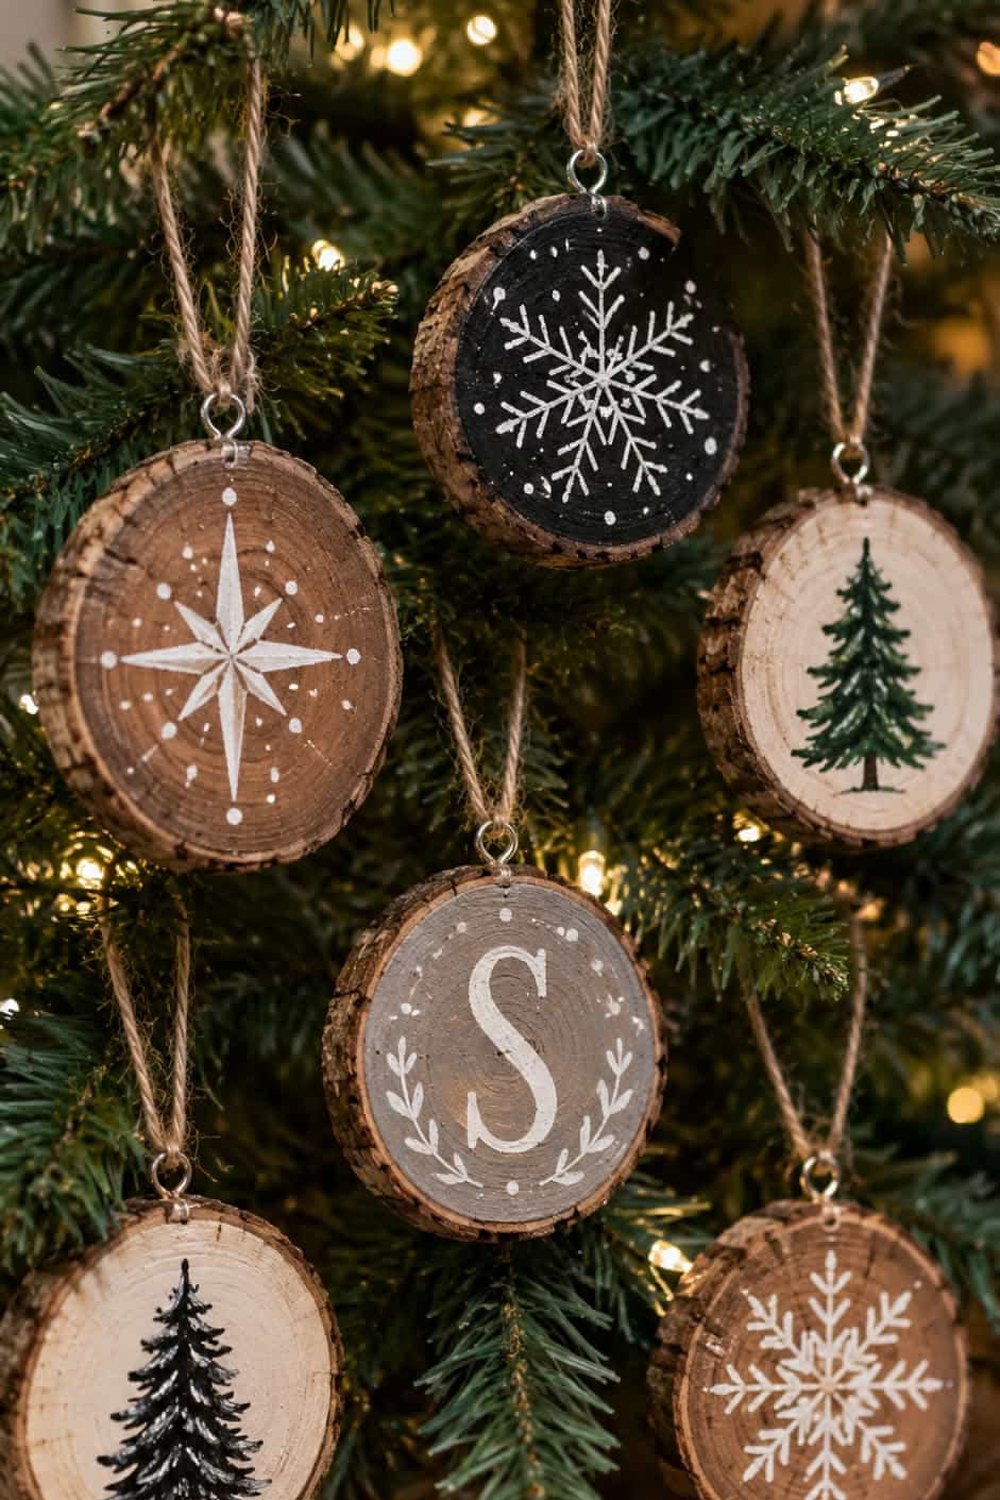
A cross-section of branch is already an ornament — it only needs a hanger and an idea.
Craft shops sell pre-cut wood slices with the bark still on, and each one is a small round canvas. Leave some plain to show the rings, stamp others with a simple star or tree, or paint a cream face and add one minimal motif in green or gold. A drilled hole and a twine loop finish them.
Styling tip: repeat one motif in three sizes across the tree. The repetition is what turns a handful of slices into a designed set rather than a craft pile.
5. Painted Acorn Ornaments: Tiny Foraged Baubles
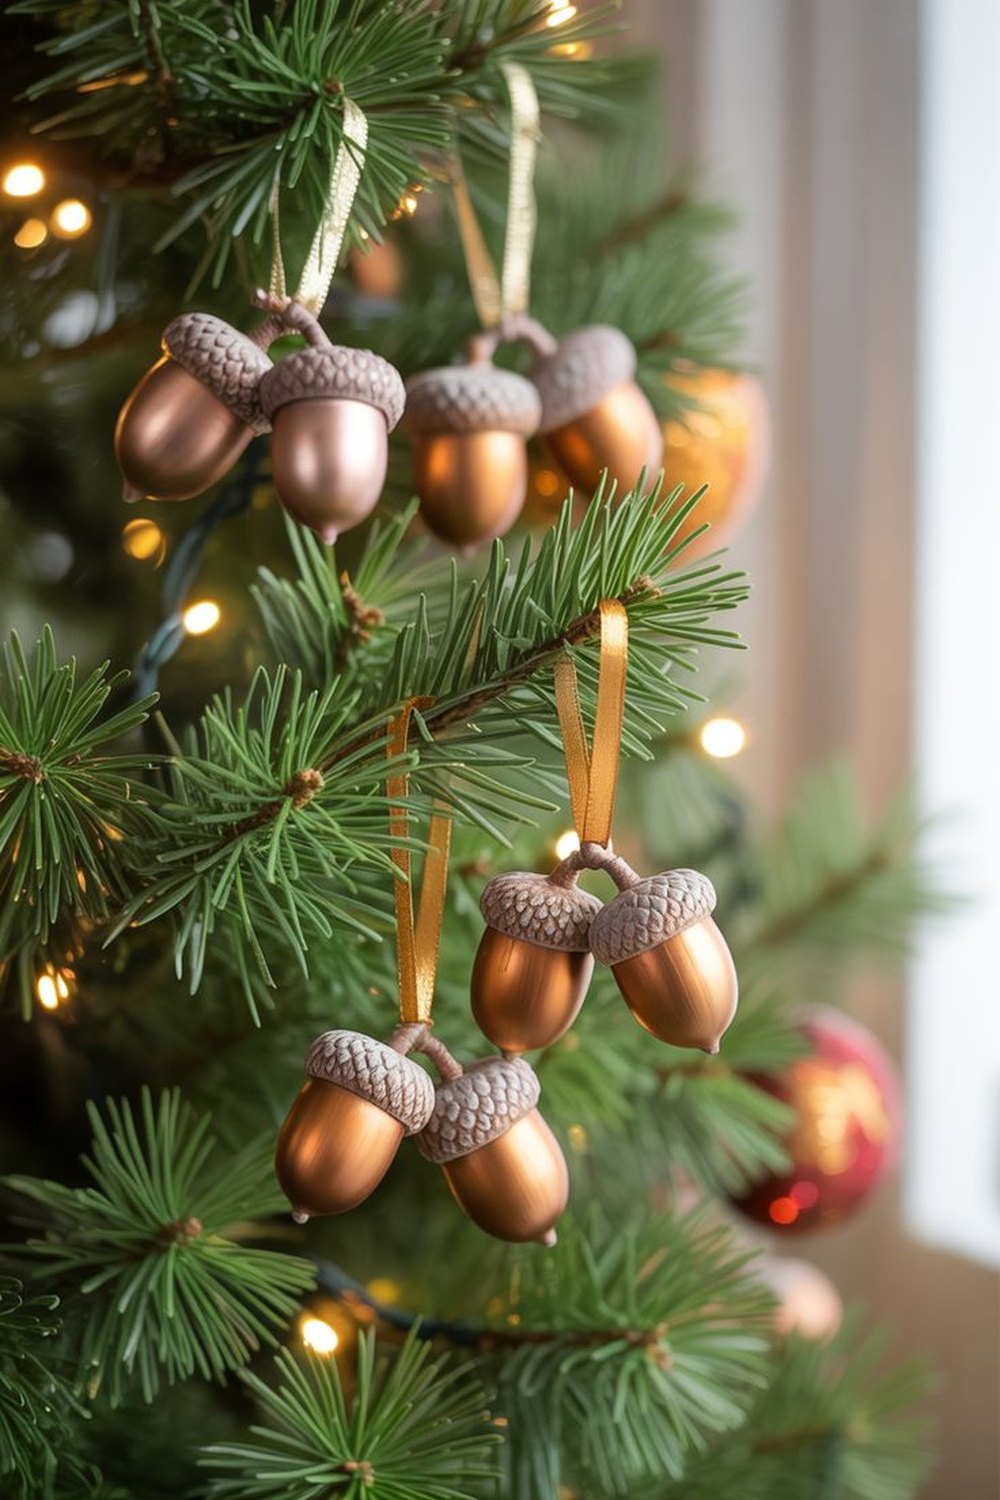
The humblest thing on the woodland floor becomes the tree's jewellery.
Gather acorns with their caps still on, paint the caps in antique gold or bronze — or paint the whole acorn a matte cream — and glue a fine thread loop under each cap. They are far too small to hang alone, so cluster them in the gaps between larger baubles, where they glint like something a jeweller made.
Styling tip: hang acorns in twos and threes on one thread, at slightly different heights. A single acorn disappears; a small cluster catches the light and the eye.
6. Salt Dough Ornaments: The Classic White Christmas Craft
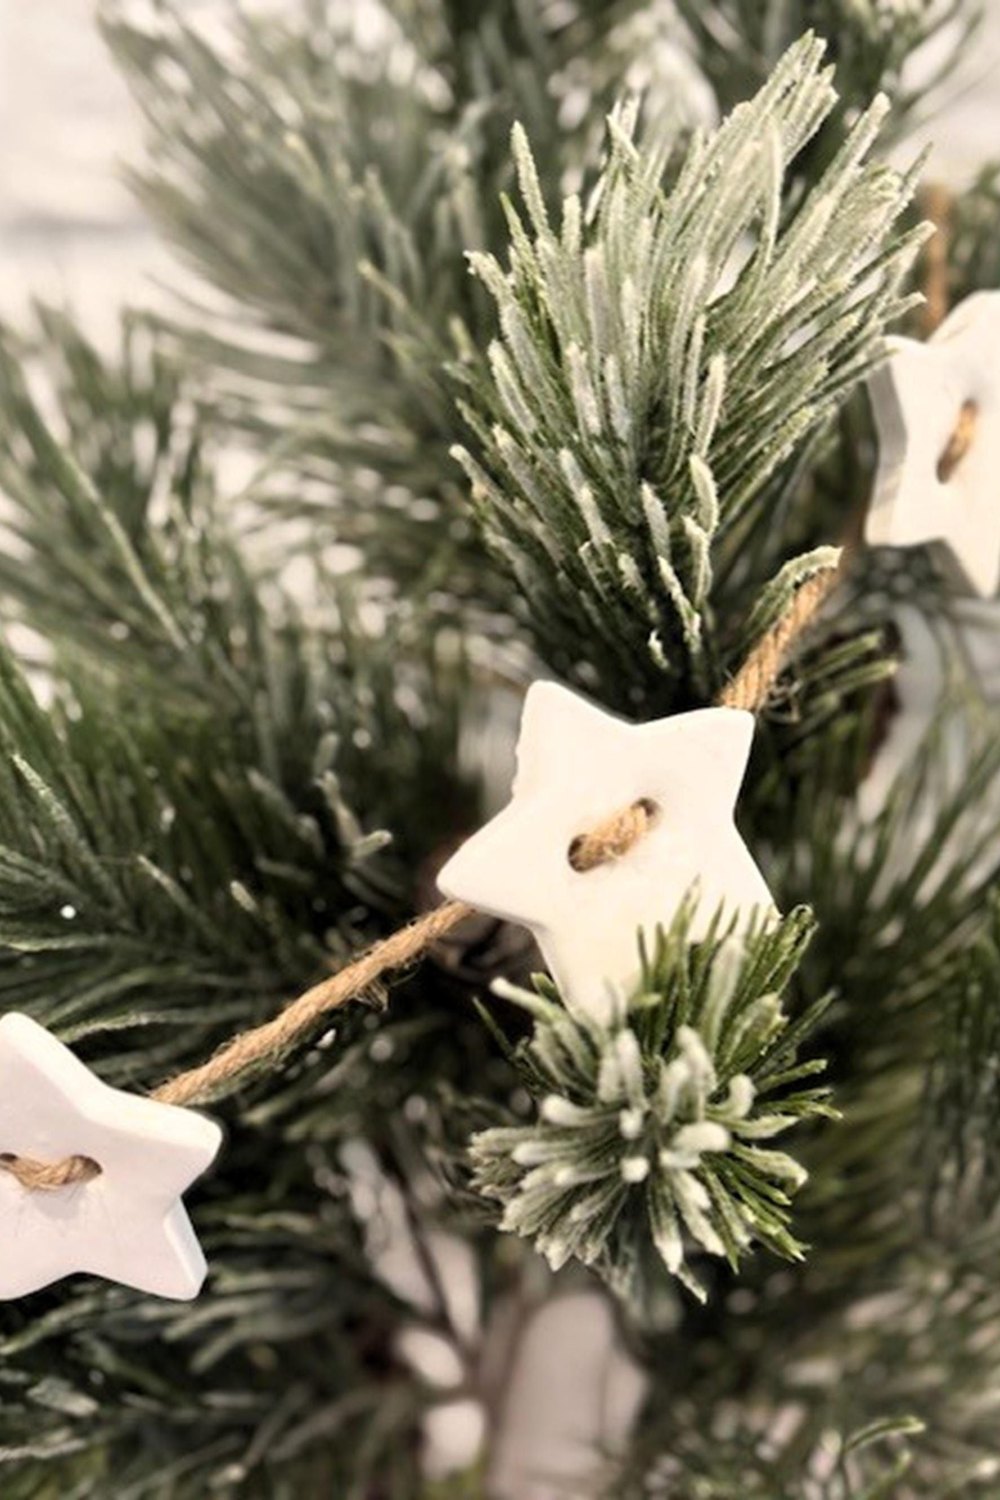
Flour, salt and water — the oldest homemade ornament of all, and still one of the prettiest.
Mix a simple salt dough, roll it out and cut stars, trees and hearts with biscuit cutters. Press a doily, a fork or a sprig of fir into the surface for pattern, bake low until the pieces are hard right through, and leave them matte white for that calm Scandinavian look, finished with twine.
Styling tip: push the hanging hole through with a straw before baking — it is much harder afterwards. Stored dry, in tissue with a little silica packet, salt dough ornaments come back year after year.
7. Mini Greenery Wreaths: A Sprig Bent into a Circle
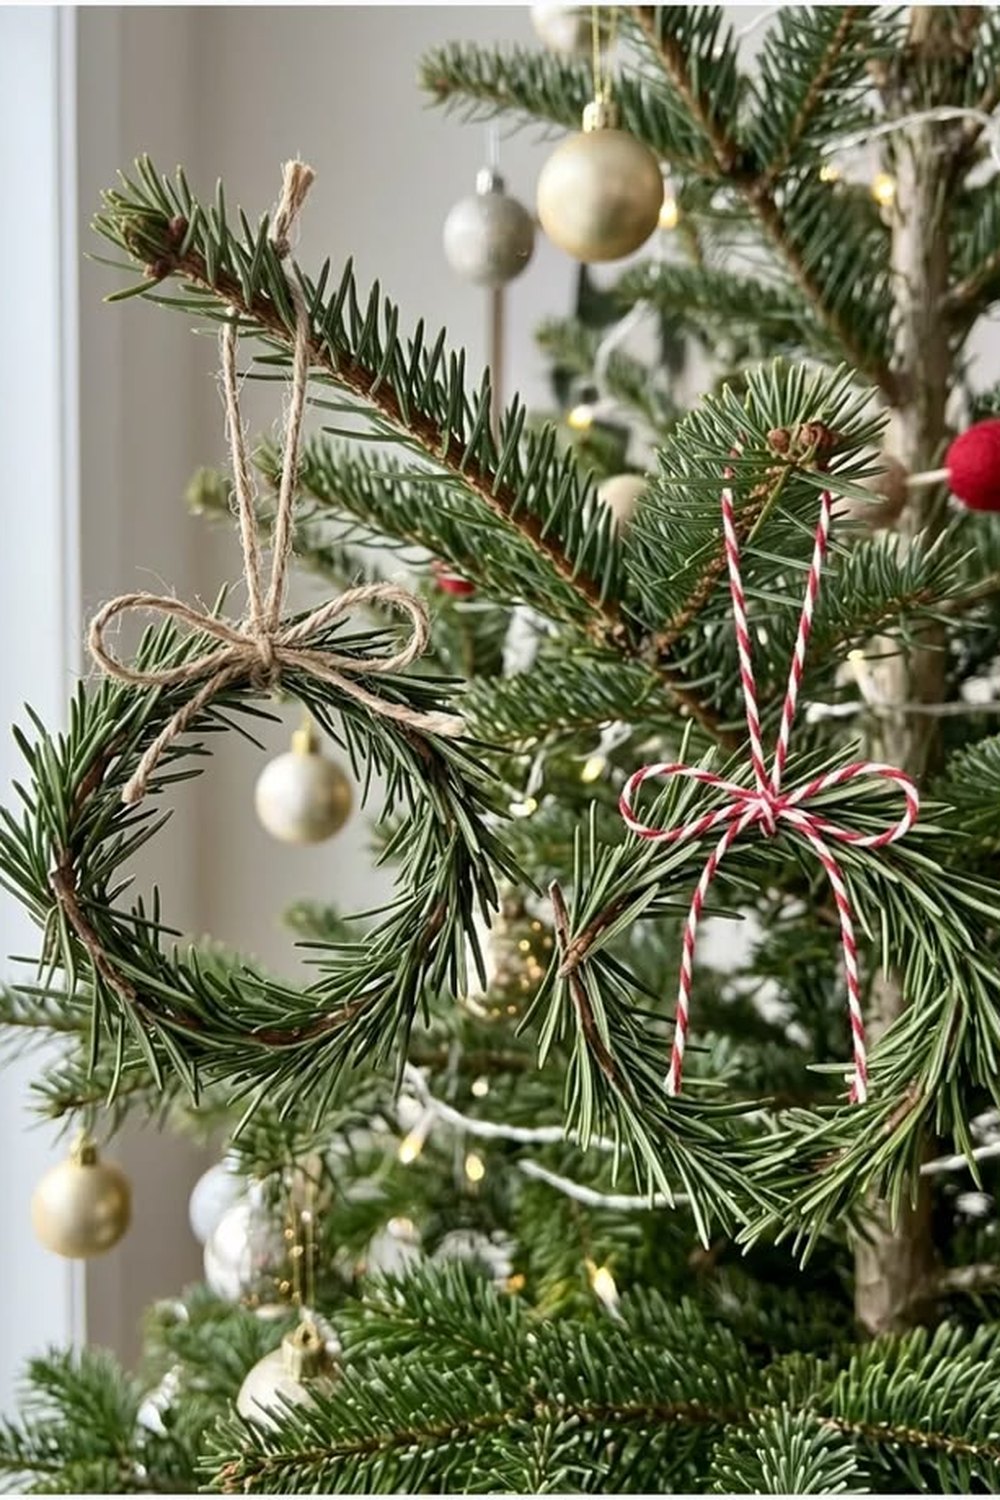
One flexible sprig, bent and tied, becomes a wreath in miniature.
Take a supple sprig of rosemary, fir or eucalyptus and bend it gently into a small circle, binding the join with fine wire or twine. Finish with the tiniest bow from your ribbon offcuts and hang the little wreaths on the tree, on door handles and on chair backs, so the same shape repeats around the room.
Styling tip: make fresh-greenery versions in the last week before Christmas, because they wilt. Rosemary holds its shape and scent the longest — and faux sprigs make a set you can keep.
Clear Baubles & Filled Ornaments
8. Snow Scene Baubles: A Tiny Tree in a Snow Globe
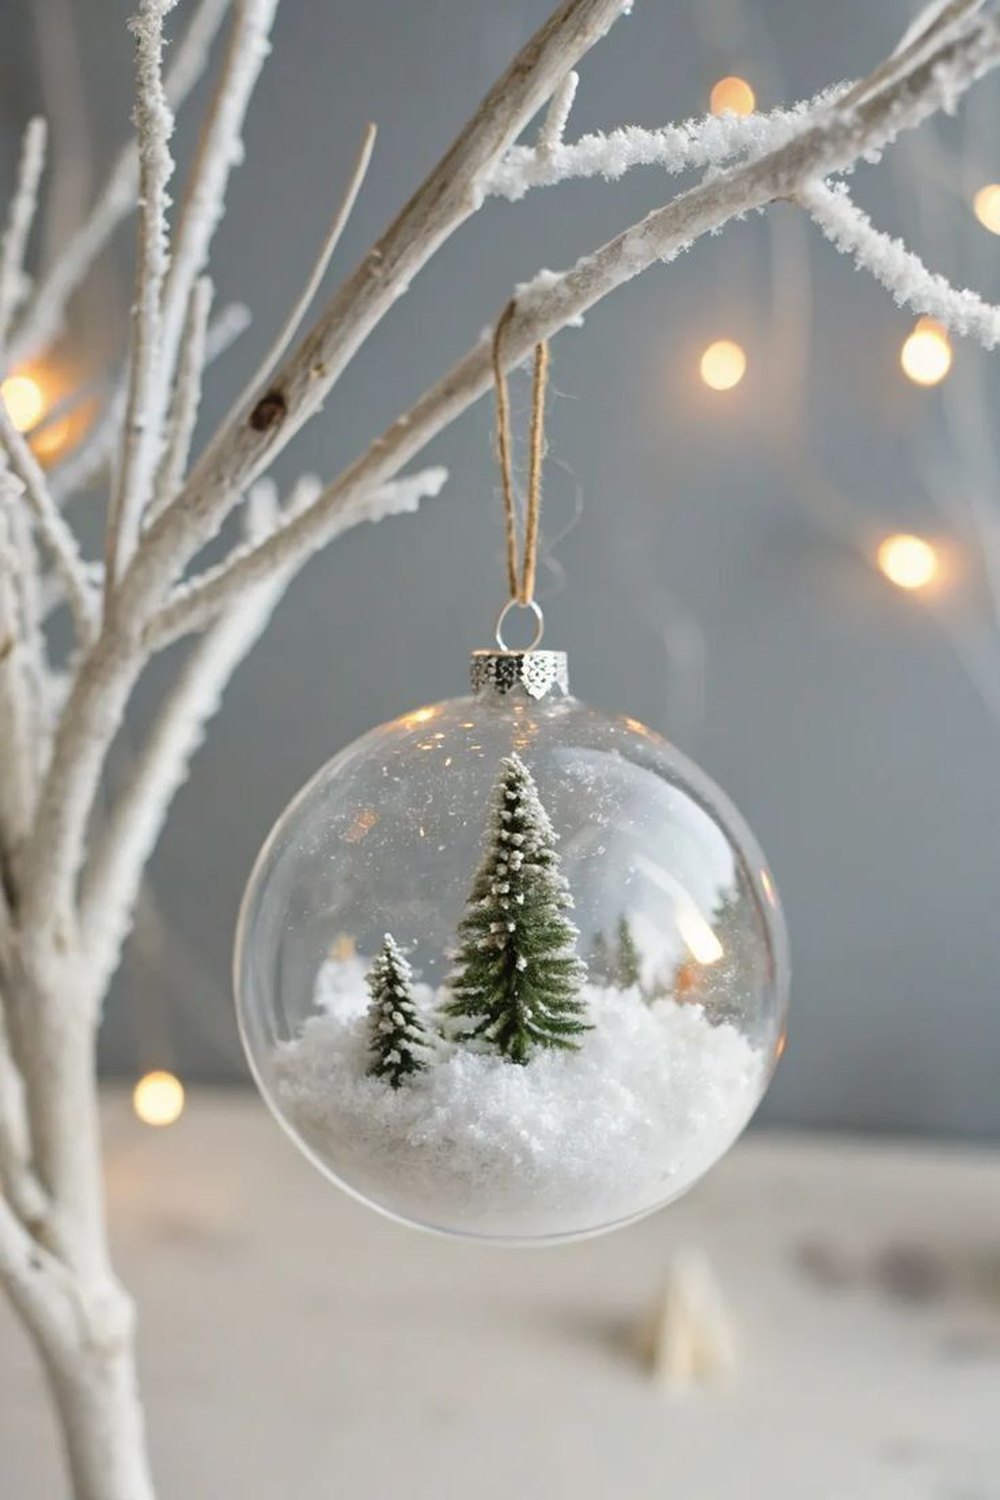
A whole winter scene, small enough to hang from a single branch.
Open a fillable clear bauble, spoon in a little fake snow, and settle a tiny bottle brush tree inside, glued lightly to the base so it stands upright. Close the cap, add a ribbon, and hang it where the lights pass through — each one glows like a snow globe that never needs shaking.
Styling tip: add the smallest pinch of fine glitter to the snow. It is invisible by day and sparkles under the tree lights at night, which is exactly when these baubles earn their place.
9. Feather-Filled Baubles: Softness Behind Glass
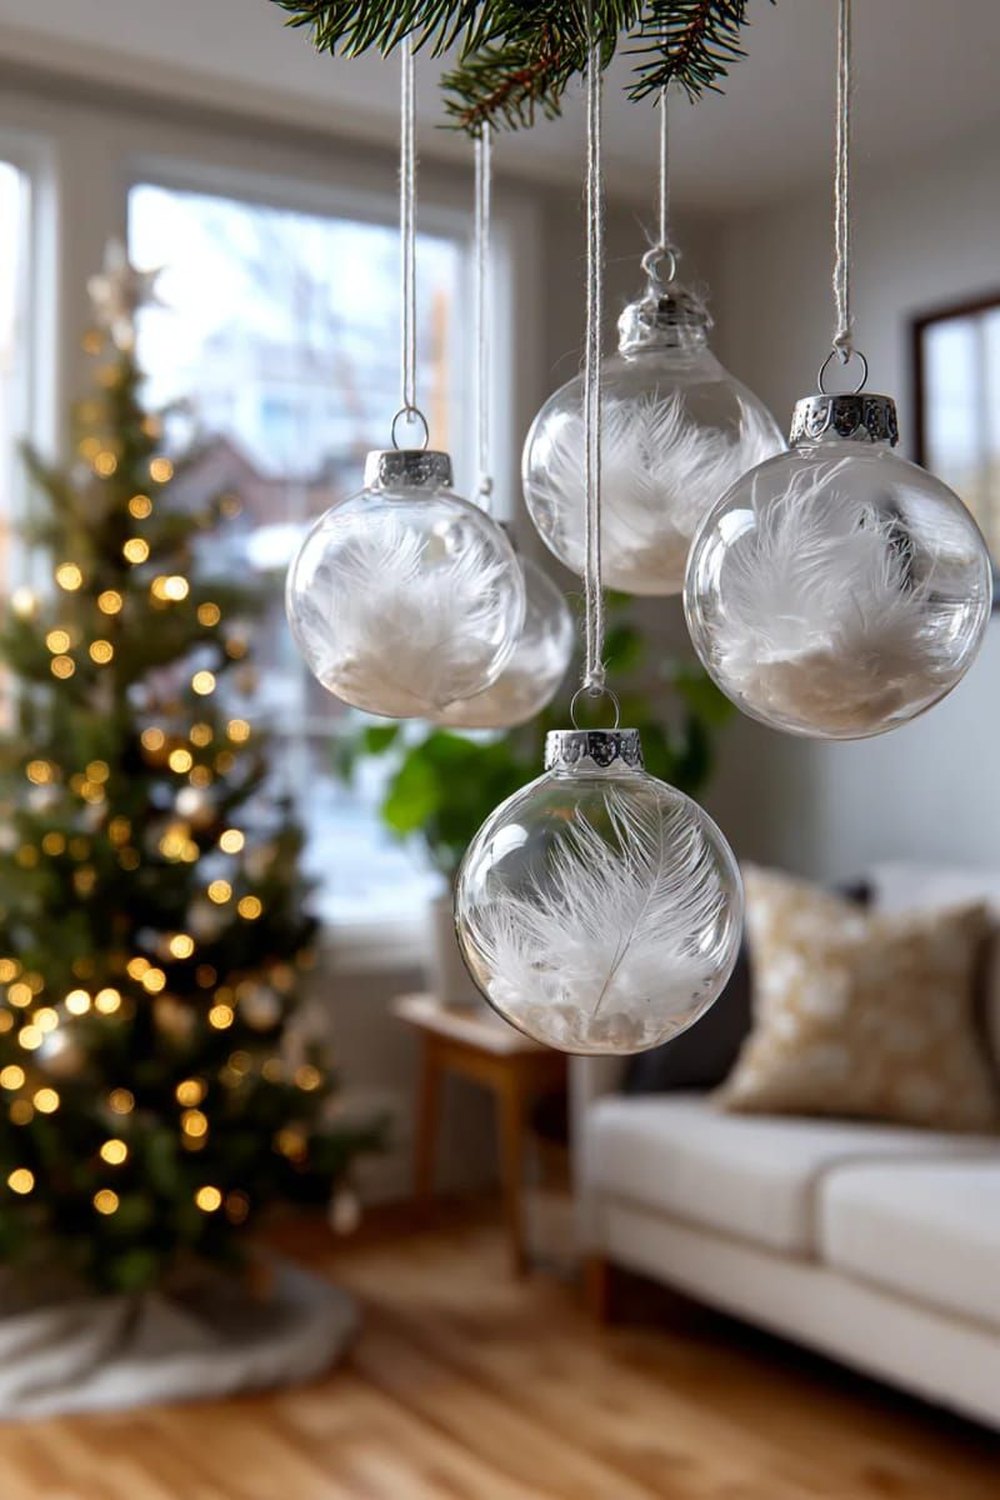
Two white feathers inside glass — the quietest luxury on the whole tree.
Push two or three soft white or cream feathers into a clear bauble with the end of a pencil and let them uncurl against the glass. The result is weightless and serene, and it is especially beautiful on a flocked tree, a white tree or anywhere a neutral, cloud-soft scheme needs texture instead of colour.
Styling tip: resist overfilling. One or two feathers keep the floating, layered look; a stuffed bauble just looks like storage. Mix two sizes of bauble for rhythm.
10. Photo Baubles: Faces Inside the Glass

The ornament guests always stop at: a photograph, protected in glass.
Print a favourite photograph small, curl it gently around a pencil, and slip it into a clear bauble so it unrolls and rests against the inside of the glass. Add the year on the ribbon and you have the ornament that turns a decorated tree into a family tree — literally.
Styling tip: print in black and white or sepia. One consistent tone makes photographs from different years and different cameras look like a collected set.
11. Greenery-Filled Baubles: A Sprig, Preserved
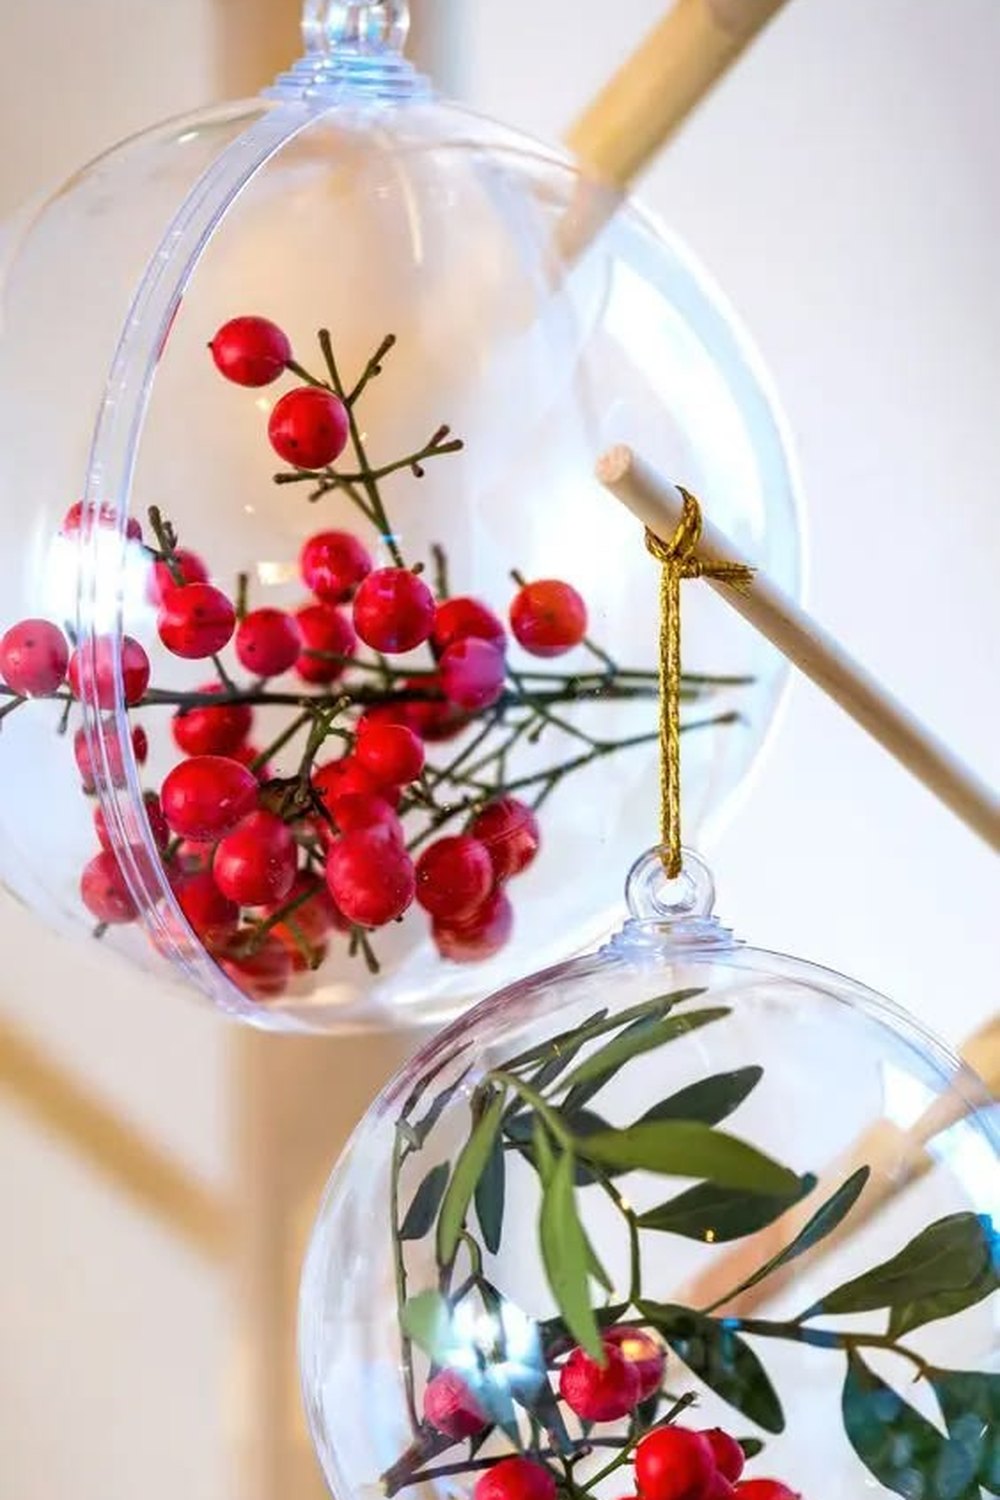
A single sprig inside glass looks like a specimen in a museum case.
Tuck one small sprig — fir, eucalyptus, dried flowers or a few red berries — into a clear bauble and let the glass do the rest. It magnifies the detail, protects the sprig, and gives the tree those fresh green pockets that break up rows of baubles beautifully.
Styling tip: use dried or faux sprigs if you want to keep them for next year, and keep it to one sprig per bauble. Restraint is the entire look.
12. Confetti Baubles: A Party Caught in a Ball
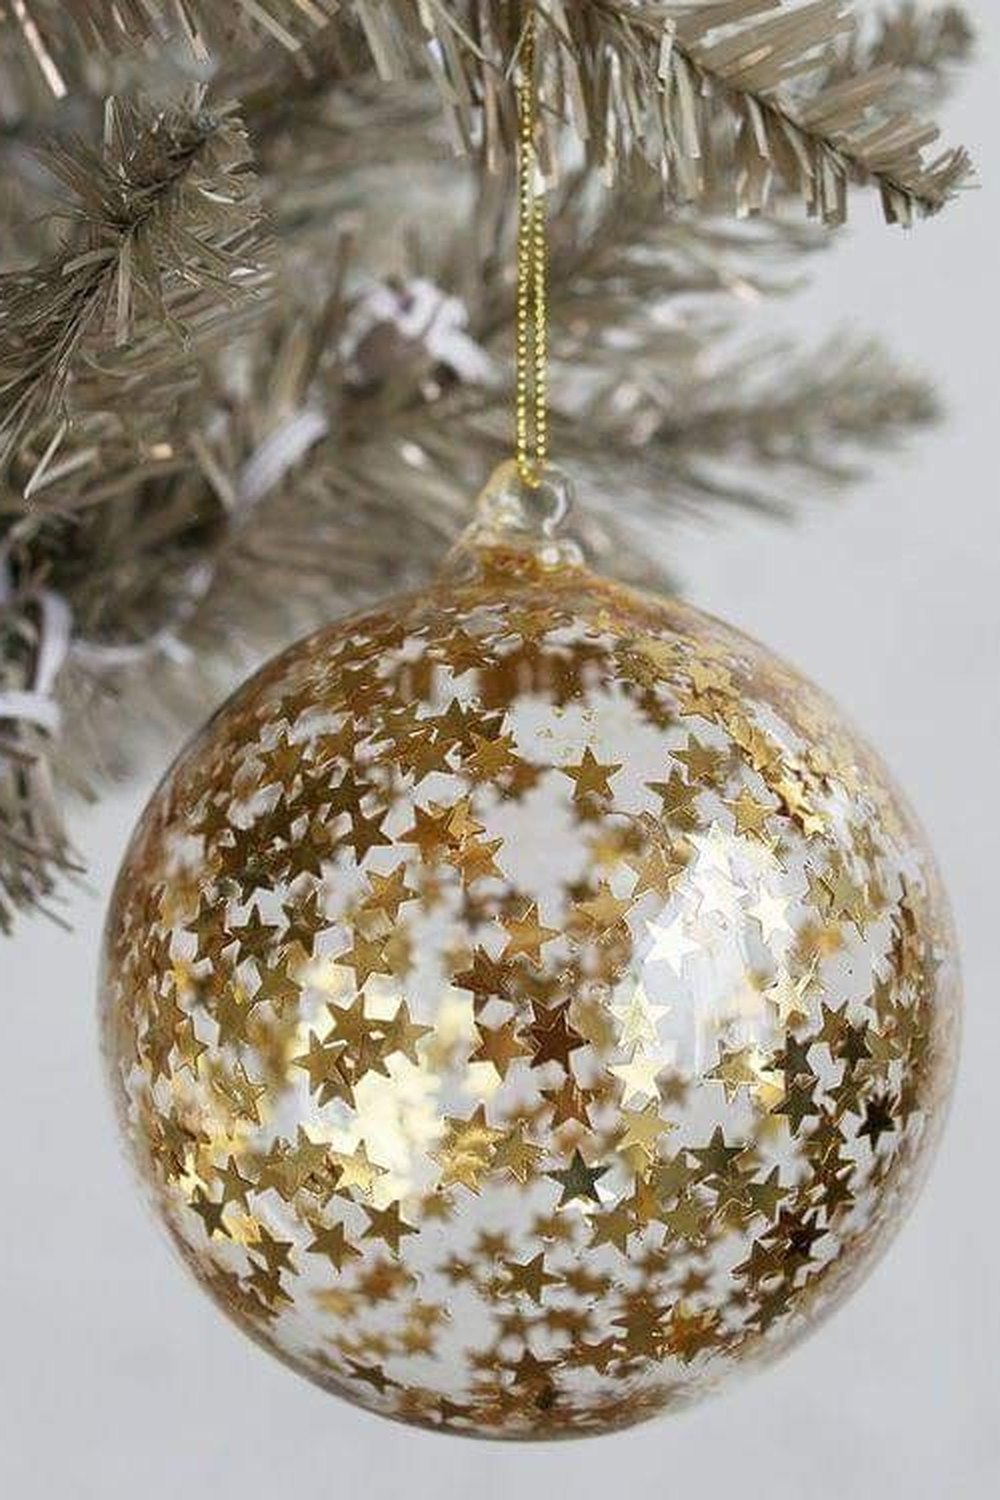
Metallic confetti turns a plain glass ball into a tiny celebration.
Fill a clear bauble about a third full with metallic confetti, curled ribbon shreds or sequins in your tree's palette, then hang it and give it the gentlest shake. No glue, no paint, no drying time — just sparkle that moves when the branch moves.
Styling tip: stay inside your palette's metallics — gold, champagne and copper mix happily together. A third full is the sweet spot; more looks heavy, less looks like an accident.
13. Memory Baubles: Tiny Moments, Kept Safe
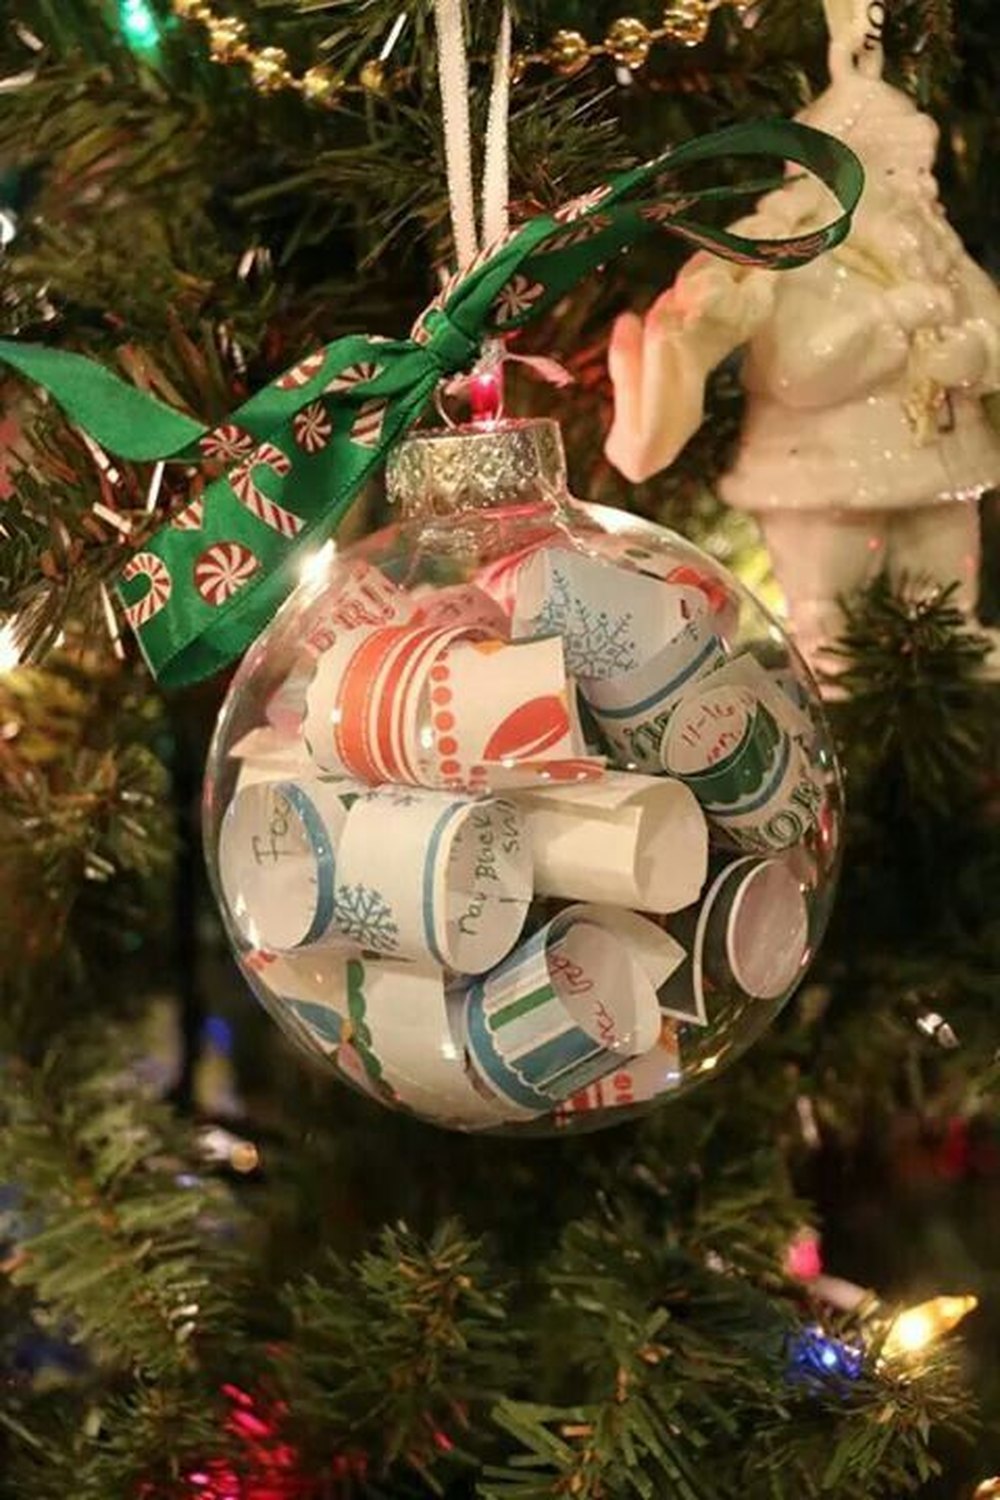
Ticket stubs, a first curl, a spoonful of beach sand — a whole year, kept in glass.
This is the most personal of all diy christmas ornaments: fill a clear bauble with the year's small evidence. Concert tickets, a baby's hospital band, sand and a shell from a holiday, a note in someone's handwriting. Close it, date it, and the tree slowly becomes a timeline of your family's life.
Styling tip: keep the contents light and completely dry so the bauble hangs safely and keeps well. Write the year on a tiny tag tied to the cap — future you will be grateful.
Paper, Card & Print Ornaments
14. Folded Paper Stars: The Old-World Star Tradition
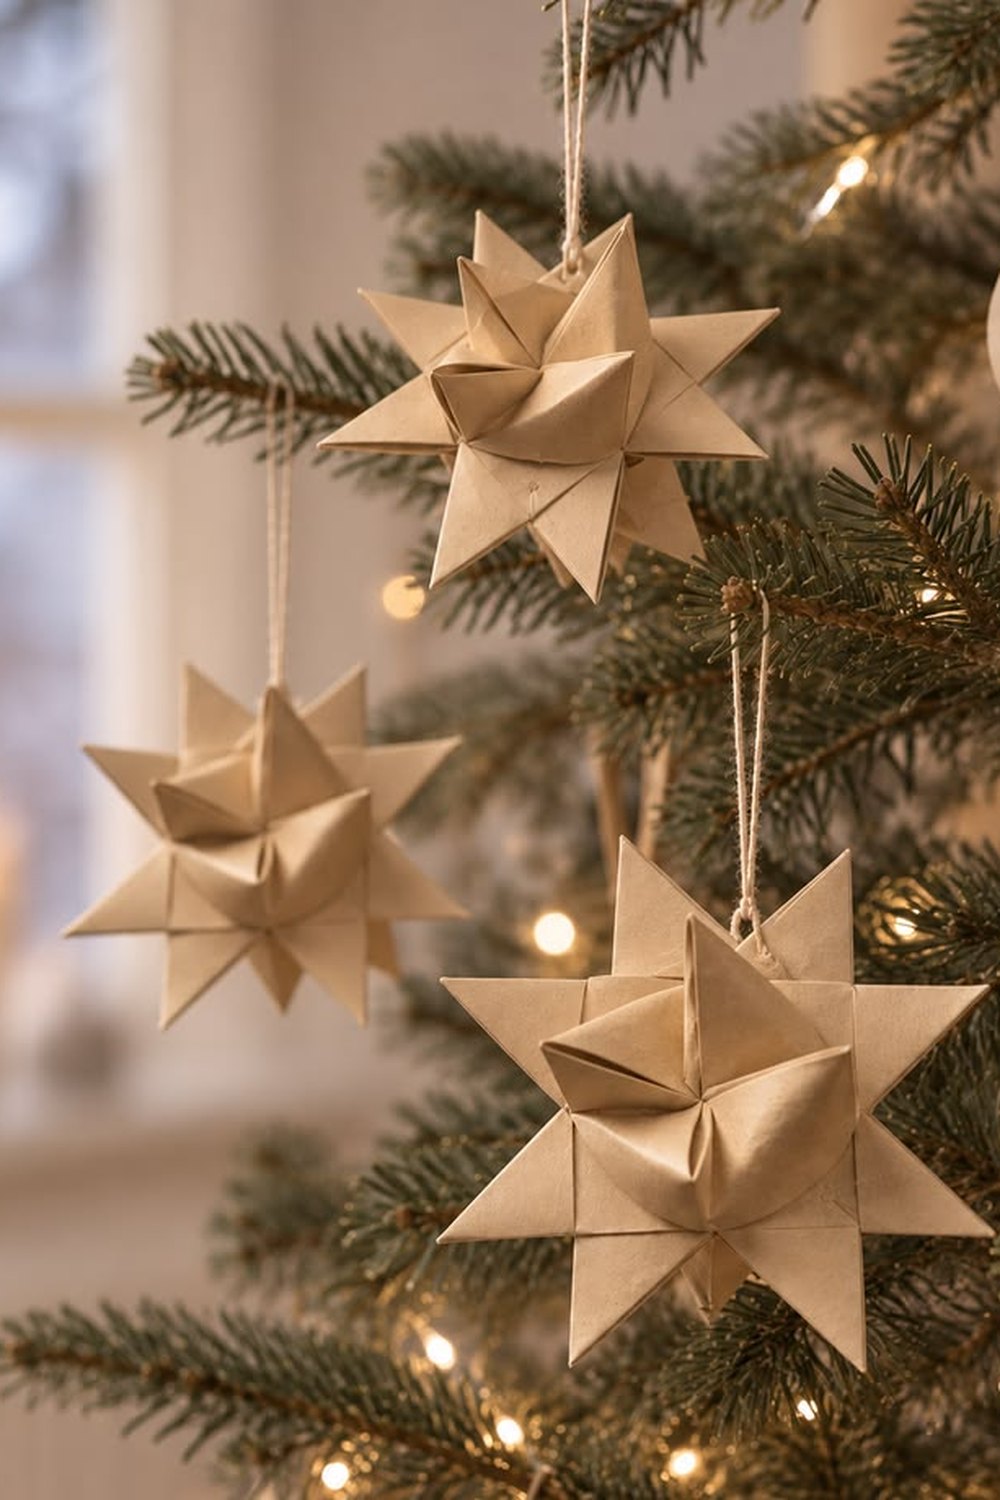
Four strips of paper, folded with patience, become the star everyone asks about.
The classic folded paper star — made from four paper strips in cream, kraft or your accent colour — is dimensional, architectural and completely flat to store. Be honest with yourself about the first one: it takes ten minutes and a little concentration. The fifth takes two minutes, and by then you will not want to stop.
Styling tip: make one design in three sizes from the same paper. Hung together through the tree, the set looks collected and considered, like something bought from a Scandinavian design shop.
15. Honeycomb Paper Baubles: Flat Paper, Perfect Spheres
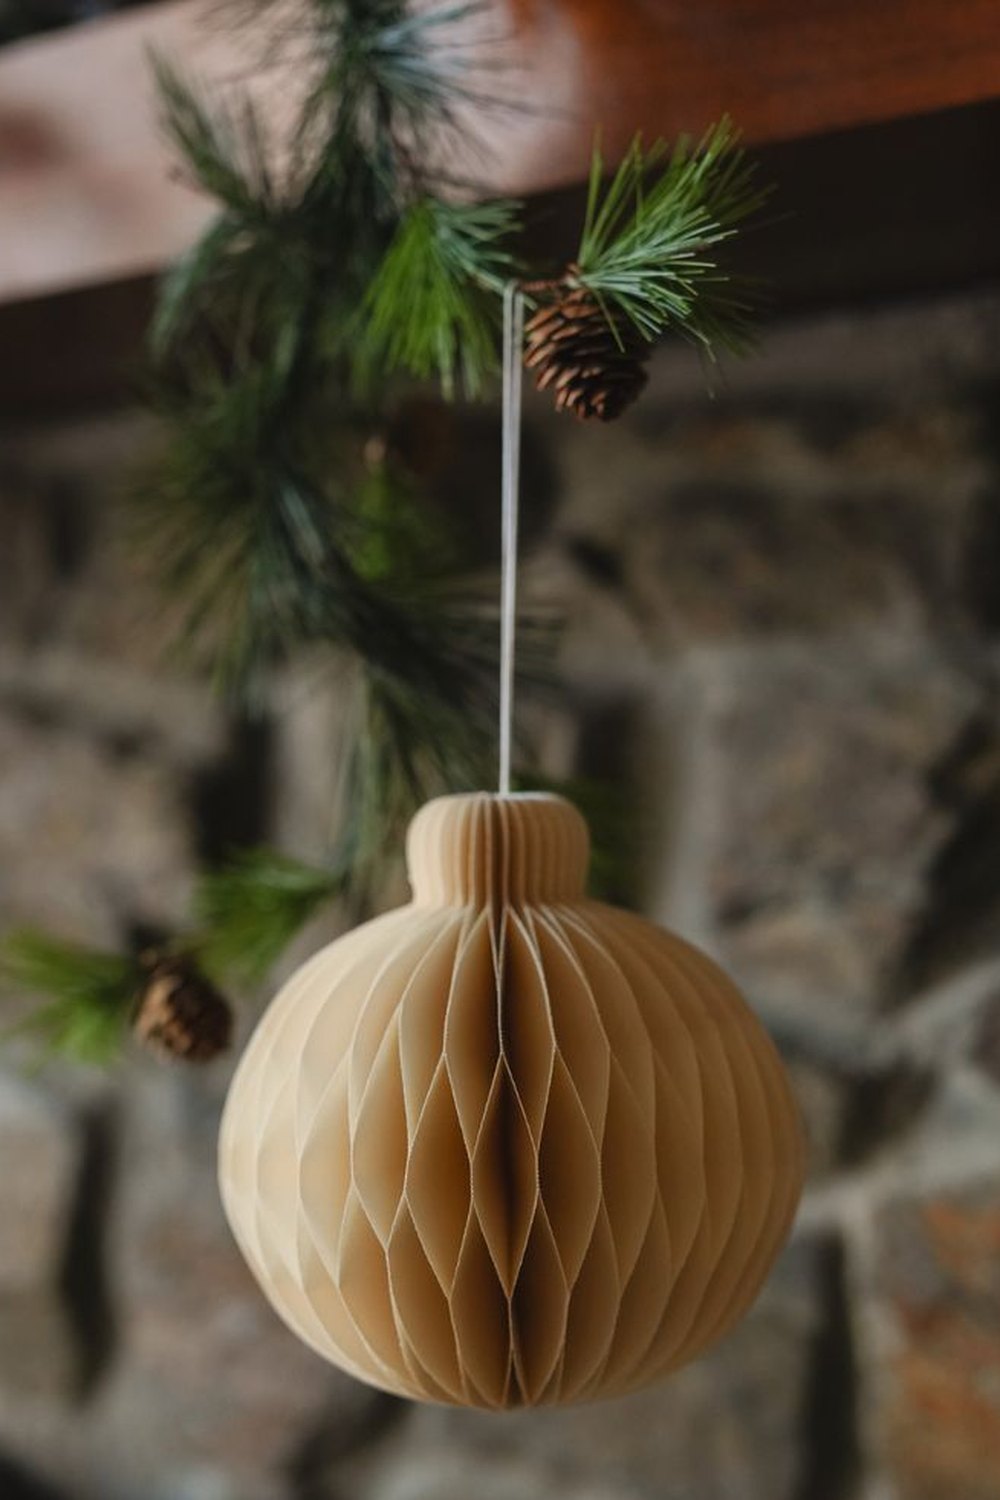
They store flat as a stack of paper and open into perfect, sculptural spheres.
Honeycomb ornaments are made by layering and gluing shaped paper so it fans open into a ball — you can fold your own from light card, and they are forgiving for beginners. In cream, kraft and one colour from your palette, they bring that soft, architectural paper look that is everywhere this season.
Styling tip: go bigger than feels sensible, especially on a sparse tree. Scale is what makes paper look premium — and in January they fold flat into an envelope.
16. Sheet Music Ornaments: Old Pages, New Life
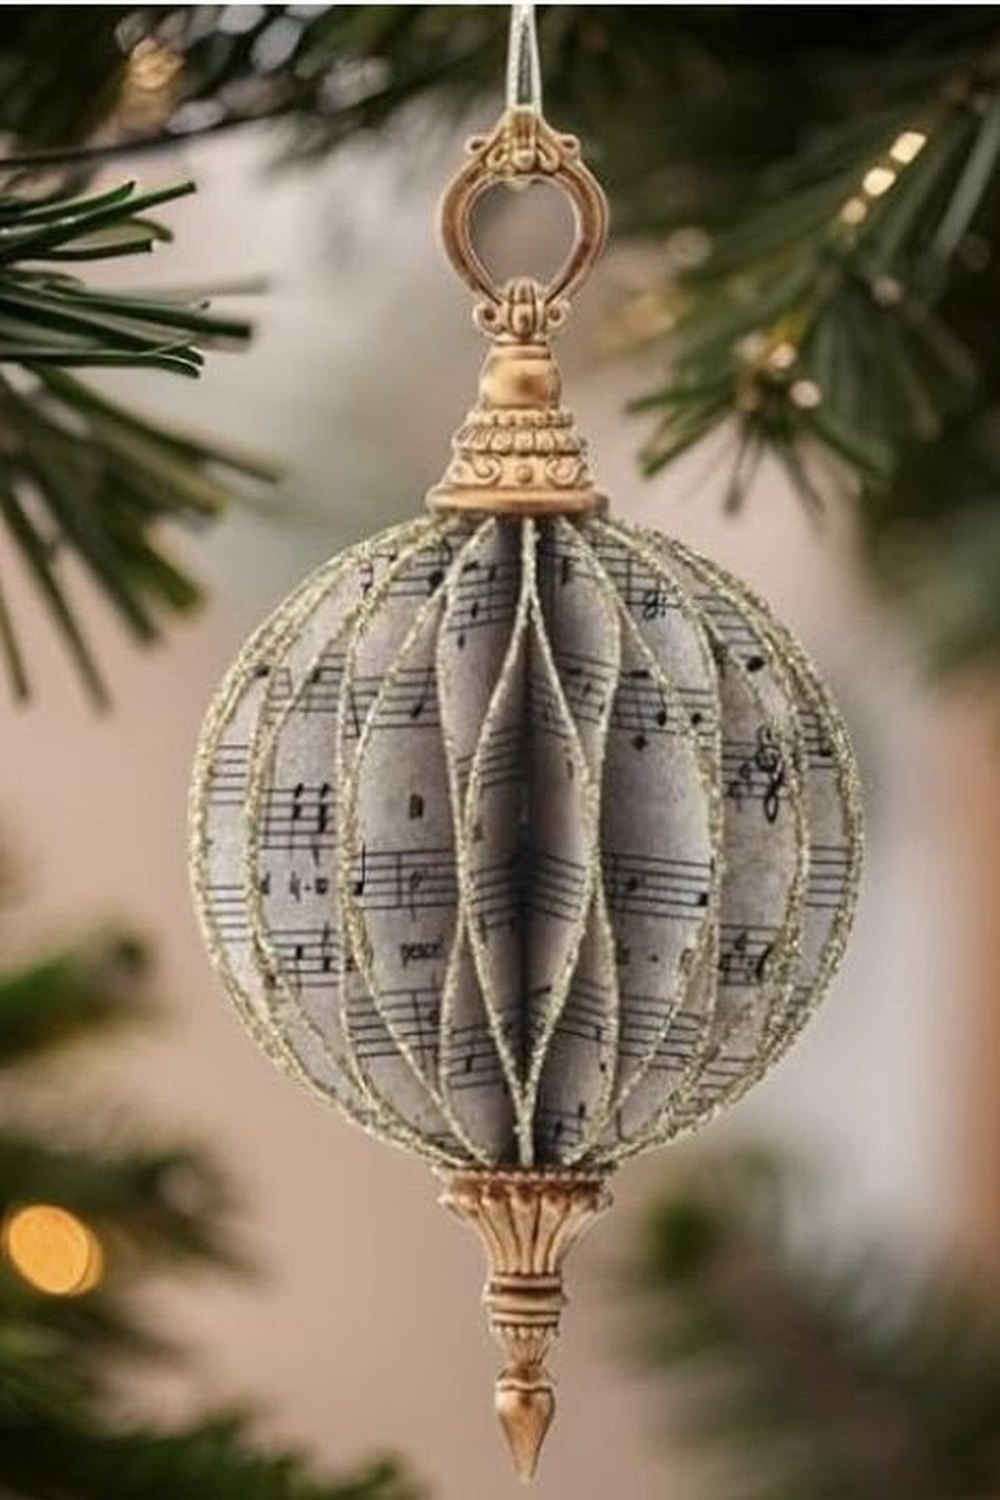
A forgotten music book becomes a tree full of quiet nostalgia.
Fold sheet music — from a charity-shop book, or pages you print at home — into stars, cones and medallions, and the printed notes become the pattern. These suit a music lover's home perfectly, but they read as simply vintage and elegant on any tree.
Styling tip: if you cannot bear to cut a real book, photocopy the pages and fold the copies. Keep the notes facing outward and readable — the print is the whole point.
17. Paper Snowflakes: Cut, Folded and Hung on Thread
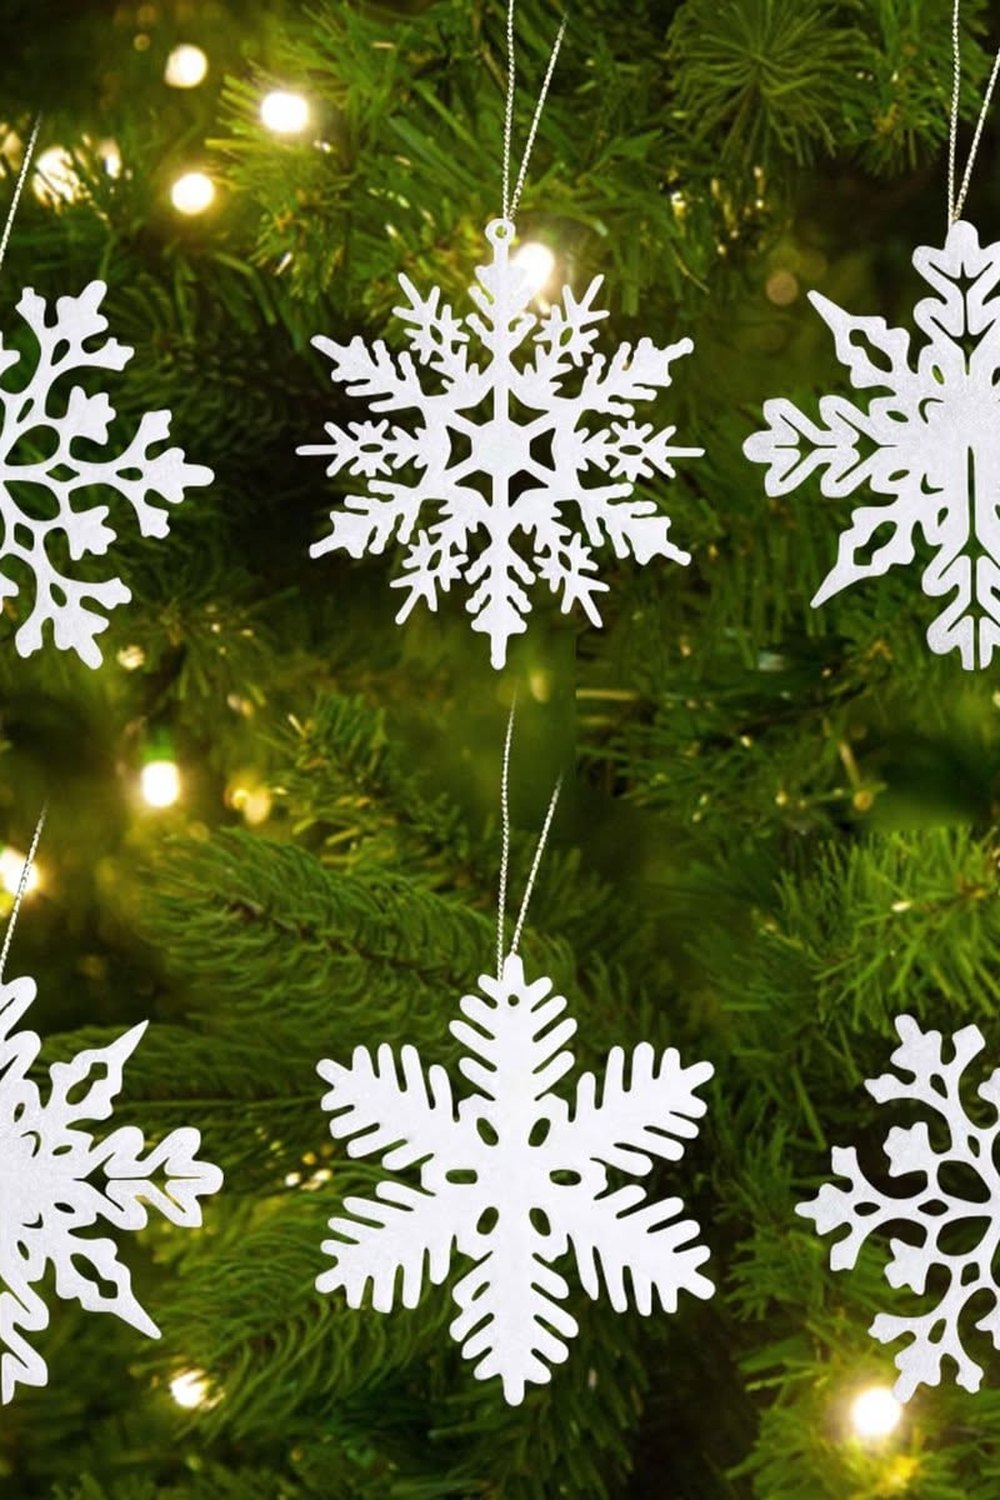
Scissors and plain paper — nobody ever outgrows the small magic of a snowflake.
Fold and cut classic snowflakes, press them flat under a book, and hang them on near-invisible thread at different depths among the branches, with a few more in the window. They move gently in the warm air from the lights and cost literally nothing beyond the paper.
Styling tip: try coffee filters — they are thin, already round and cut like a dream. Hang snowflakes in odd-numbered groups; clusters look like weather, singles look lost.
18. Kraft Card Silhouettes: Stars, Trees and Reindeer
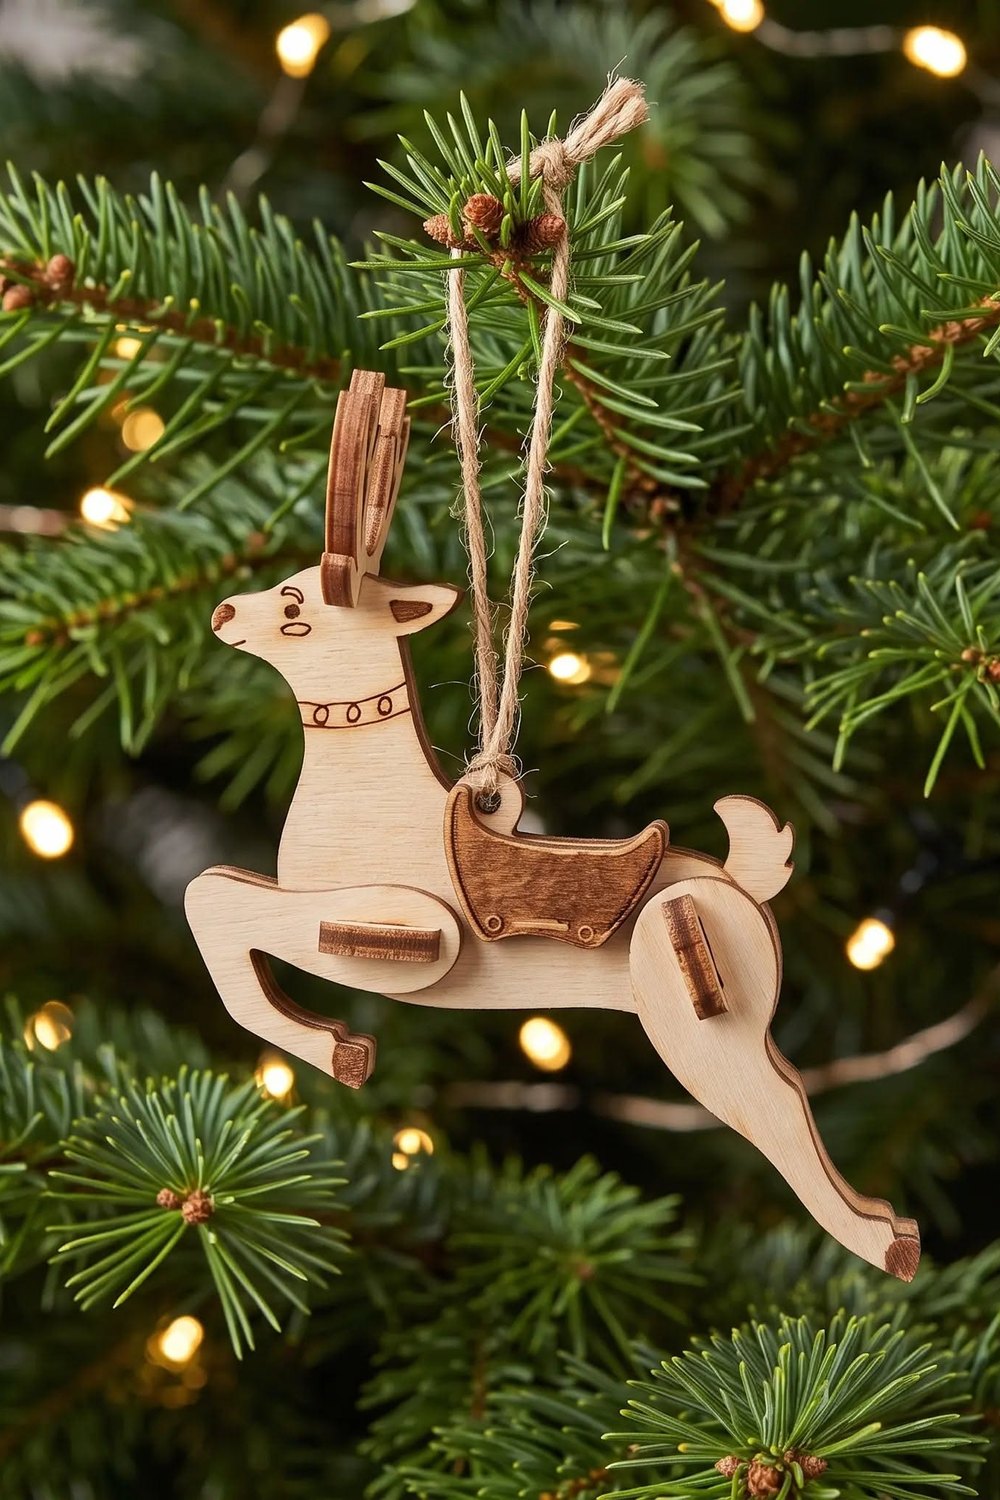
One sheet of kraft card, one simple shape, one length of twine.
Cut bold silhouettes — stars, trees, reindeer, little houses — from kraft card or thick coloured card, punch a hole and add a twine hanger. Layer two colours together for depth, or edge a shape with a white gel pen for a hand-finished detail that catches the light.
Styling tip: keep the shapes bold and simple. Fine detail tears, curls and disappears at tree distance; a strong silhouette reads from across the room.
19. Map Paper Ornaments: For the Family That Travels
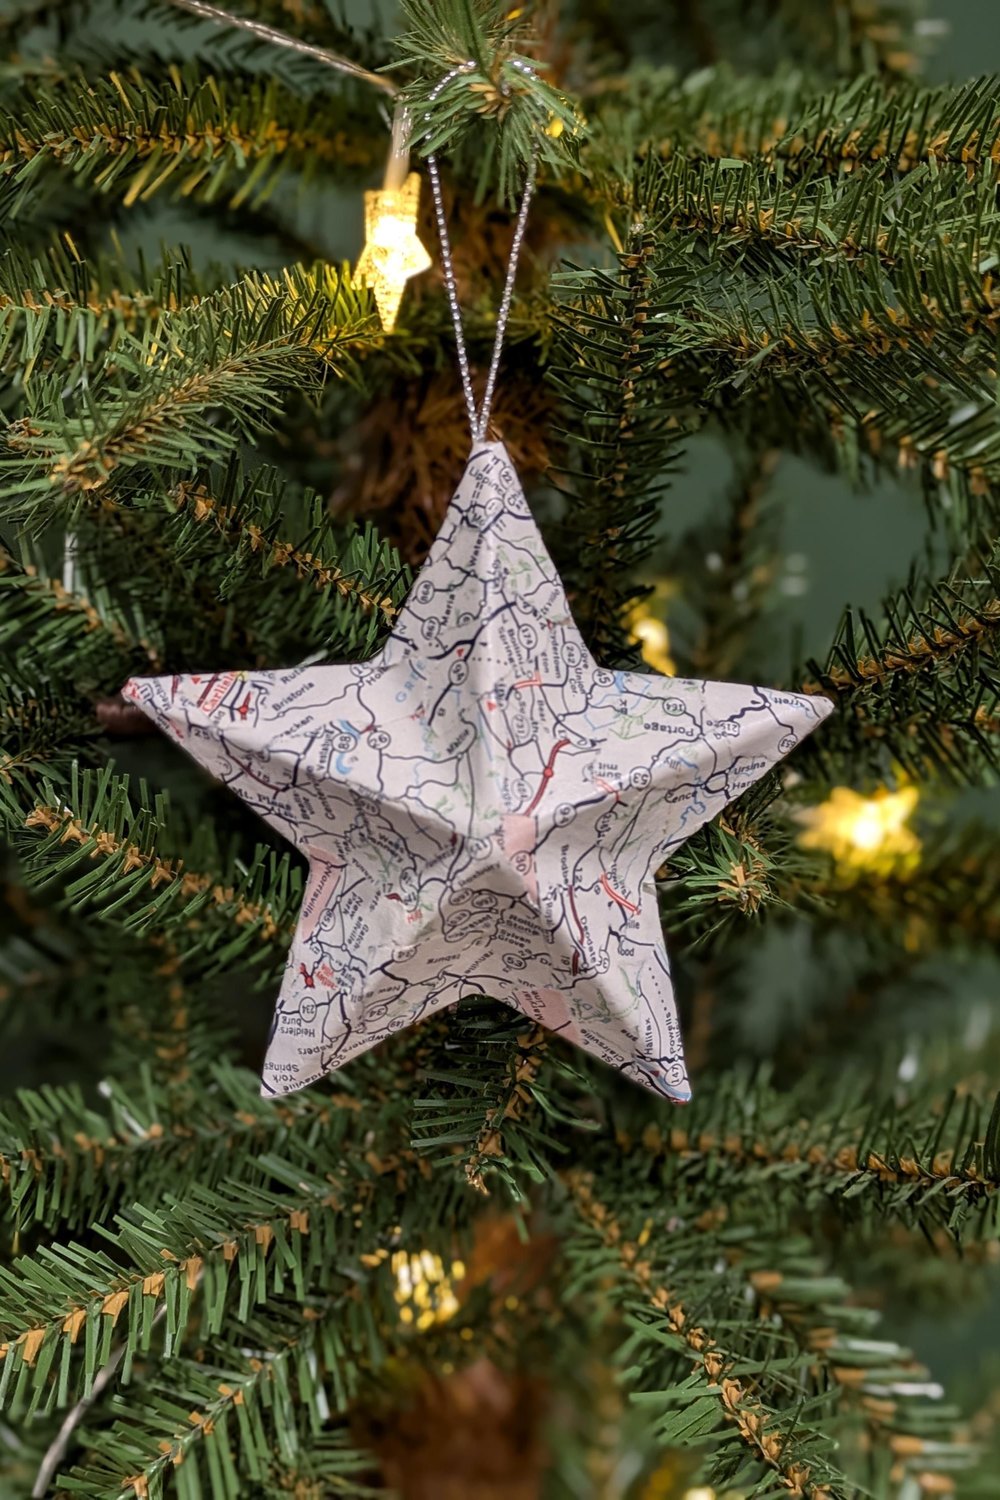
Old maps folded into stars turn the year's journeys into decorations.
Fold old maps, atlases or map-print paper into stars and simple baubles, and mark the places your family has been with a tiny drawn heart. It is a travel tradition growing on the tree year by year — part decoration, part storybook of everywhere you have been together.
Styling tip: fold photocopies of precious maps and keep the originals safe in a drawer. Choose maps with soft, faded colours; they sit most elegantly among green branches.
Fabric, Ribbon & Yarn Ornaments
20. Velvet Ribbon Bows: The Season's Signature, Tied by Hand
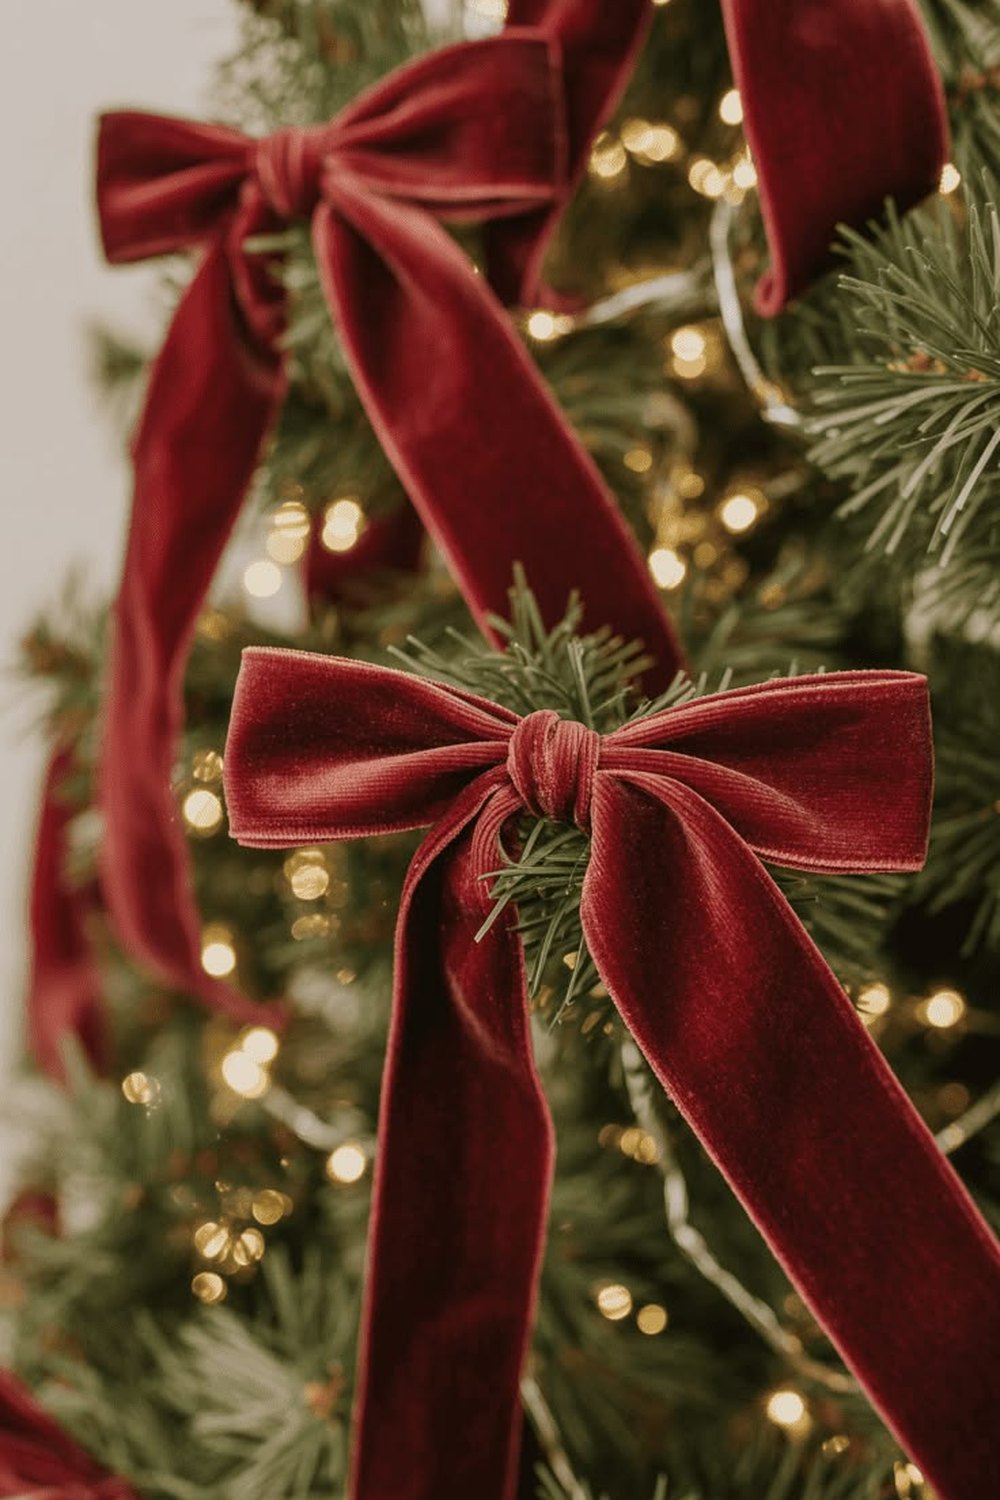
If you make only one thing this year, tie bows — they are the look of the season.
Tie generous bows from wide, wired velvet ribbon and fix them straight onto the branch tips, spaced evenly from the top of the tree to the bottom, with the tails left long. In burgundy, forest green, blush or champagne, a dozen bows do the visual work of fifty small ornaments — this is the single most-saved handmade touch of the year.
Styling tip: buy one long bolt of ribbon and use it everywhere — the tree bows, the wreath, the mantel and the gift wrap. One ribbon repeated is what makes a whole home look designed.
21. Yarn-Wrapped Stars: Cosy Texture on a Card Shape
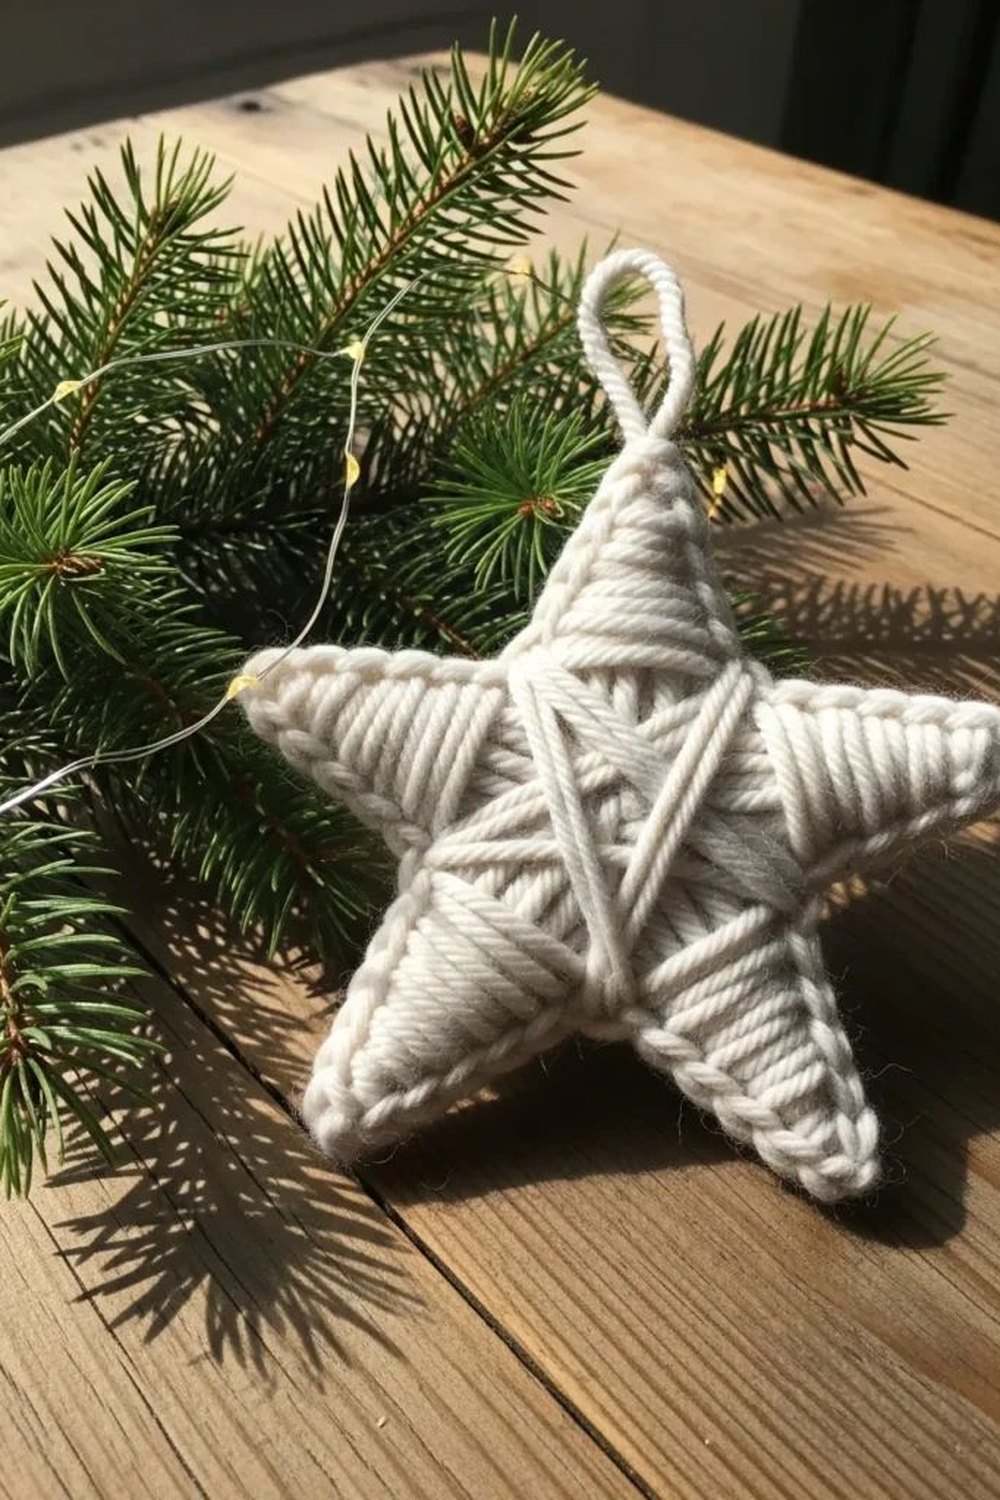
A card star and a ball of yarn become the cosiest ornaments on the tree.
Cut a star — or a tree, or a heart — from thick card, then wrap yarn around and across it, changing direction as you go, until the shape is plump and fully covered. Tuck the end underneath, add a loop, and you have an ornament with the soft, knitted texture the rest of the tree is missing.
Styling tip: chunky yarn covers fast and looks richest. Keep to two or three colours from your palette, and add a tiny bell at one point of a few stars for a whisper of sound.
22. Stitched Felt Ornaments: Soft Shapes, Simple Stitches
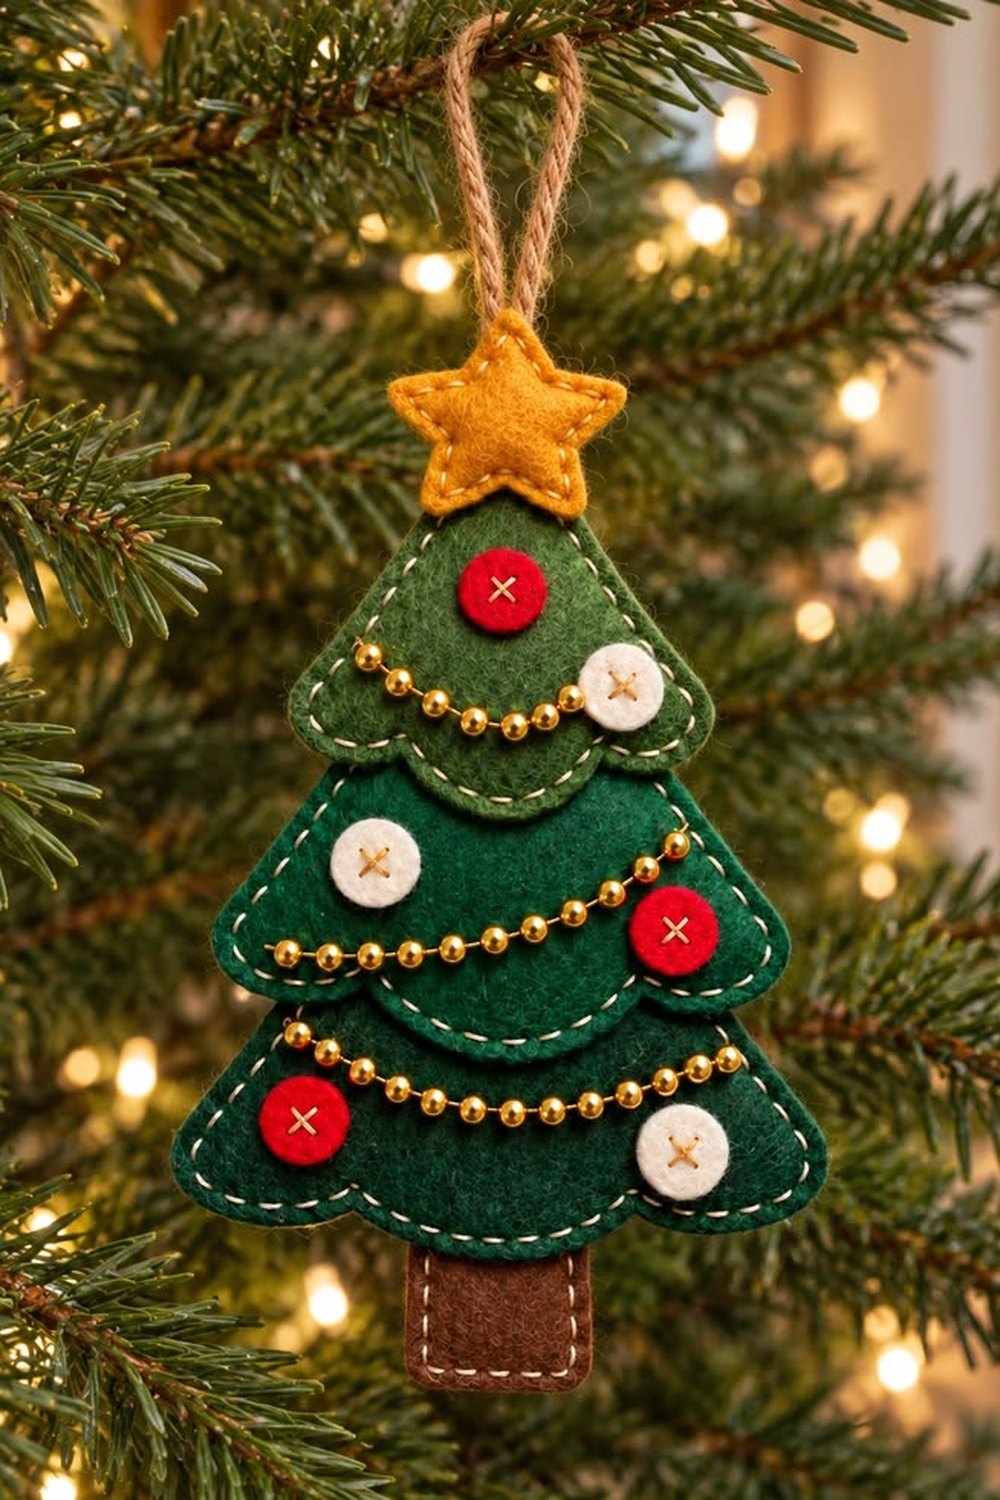
Felt does not fray, so two shapes and one running stitch are genuinely all it takes.
Cut two matching shapes from felt — trees, stars, hearts, little gingerbread figures — stitch around the edge with contrasting embroidery thread, and tuck in a pinch of stuffing before you close the last centimetre. The stitches are meant to show; that visible handwork is the charm.
Styling tip: felt ornaments are light and completely unbreakable, which makes them the ones for the lowest branches — and the safest diy christmas ornaments to make with children and hang around pets.
23. Fabric-Wrapped Baubles: Plaid and Linen from the Scrap Bag
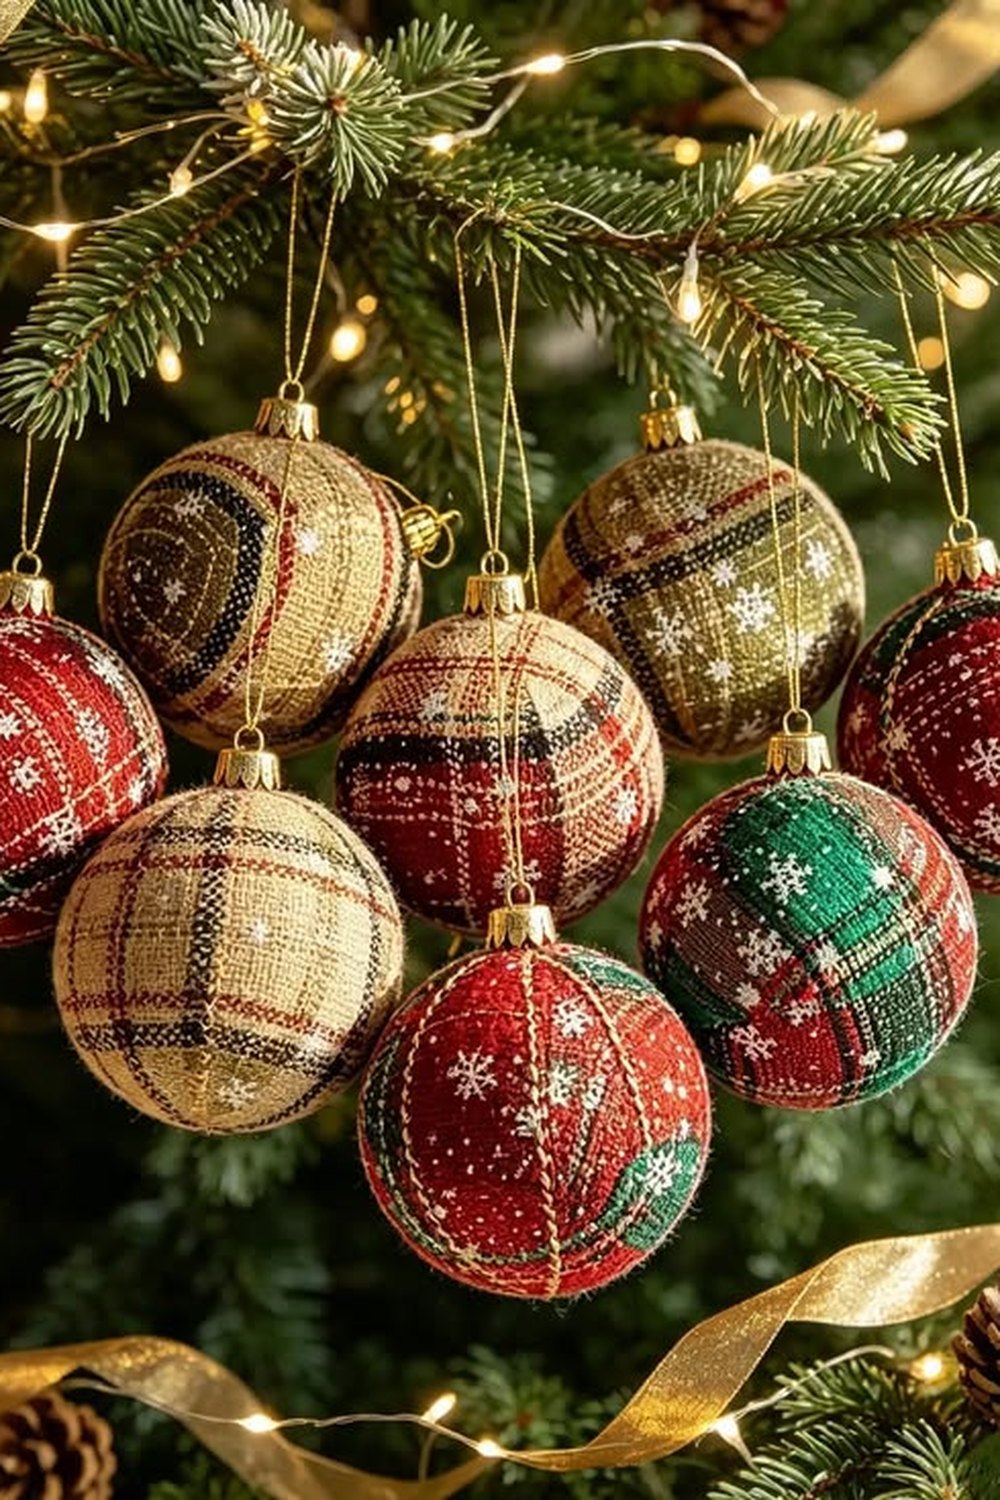
A tired old bauble plus one square of fabric equals a brand-new ornament.
Take plain or scratched baubles you already own, wrap each one in a square of fabric — plaid, linen, velvet offcuts — gather the fabric neatly at the top and tie it with twine or ribbon. The scratches vanish, the textile texture arrives, and not one new ornament had to be bought.
Styling tip: thin fabrics sit the smoothest, so save heavy velvet for bows. If you use a plaid, turn the bauble as you wrap so the pattern sits straight at the front.
24. Twine-Wrapped Baubles: Rustic, Wrapped and Patient
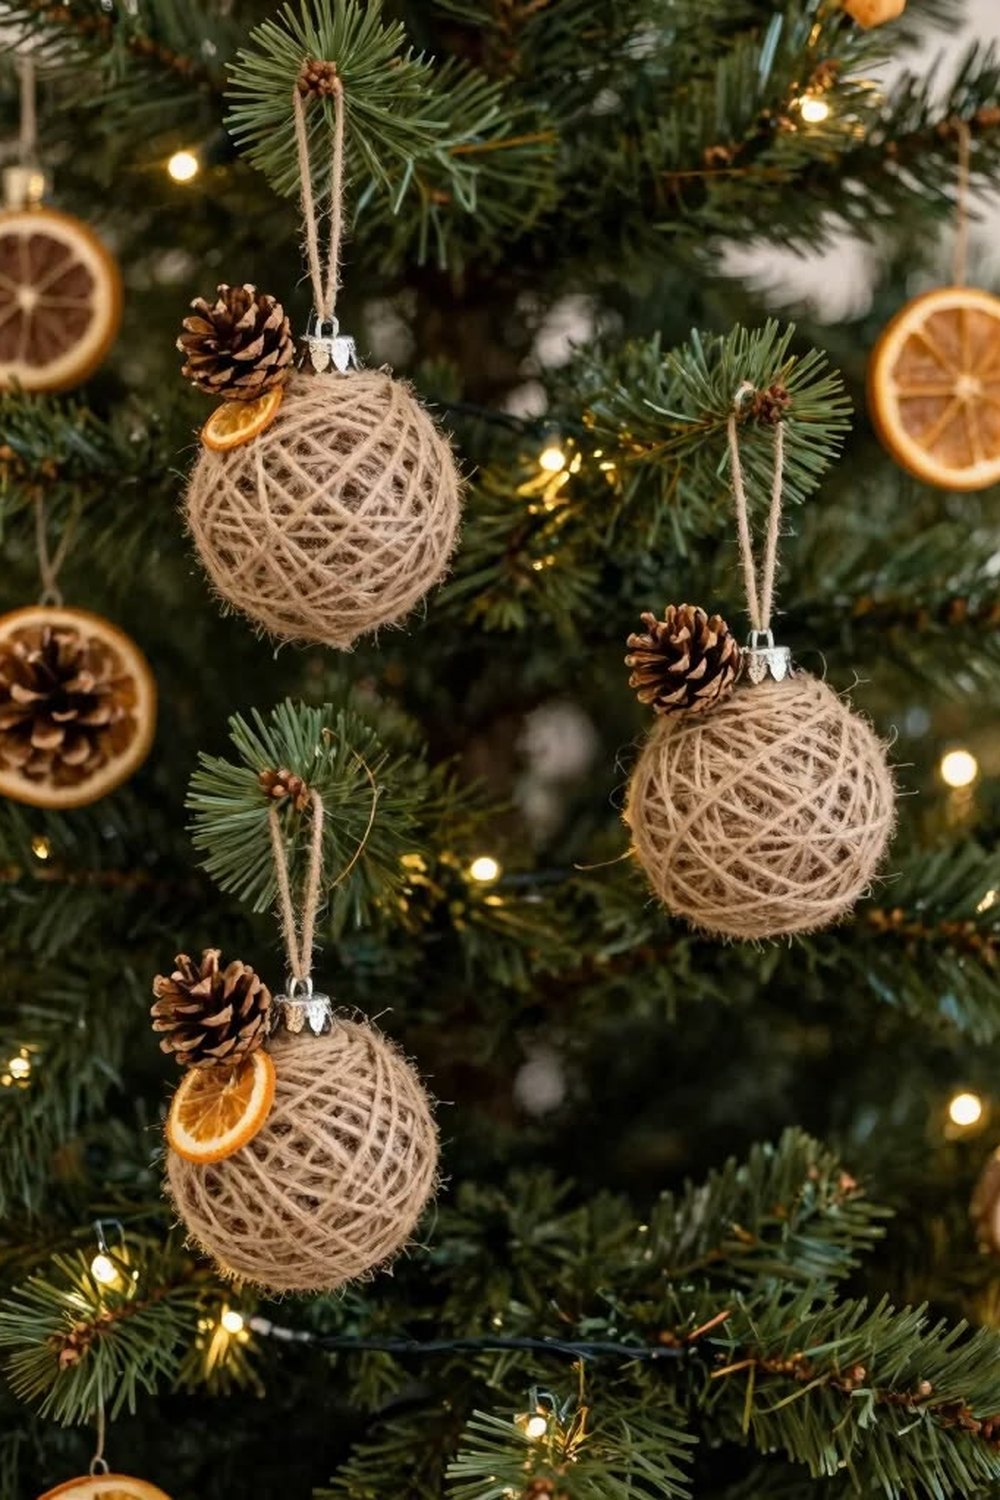
A glue gun, a ball of twine and one quiet evening in front of a film.
Wind jute twine around a bauble with small dabs of hot glue, row by row, keeping the tension even until the whole surface is covered. Finish with a twine loop and, if you like, a tiny sprig of greenery tucked at the top. The result is pure rustic texture, and it pairs with every natural piece in this guide.
Styling tip: start at the top and work down in a slow spiral, pressing each row snugly against the last. Even rows are the difference between handmade and homemade-looking.
25. Yarn Pom-Pom Ornaments: Soft Baubles by the Dozen
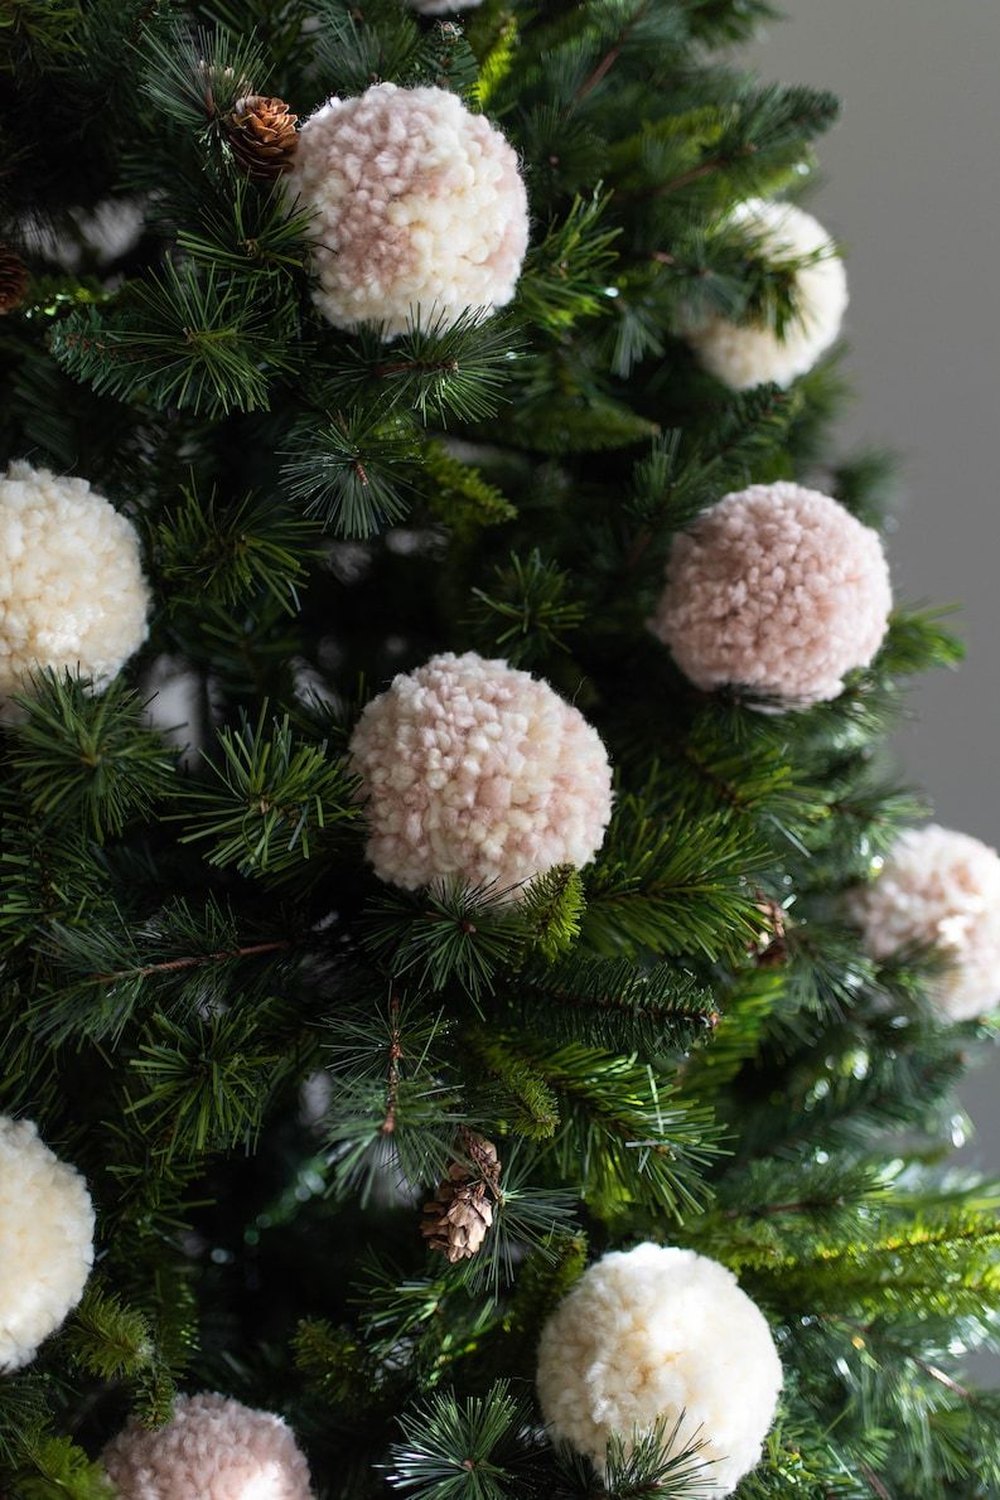
Pom-poms are baubles with the volume turned up — soft, light and unbreakable.
Wind yarn around a fork or a simple pom-pom maker, tie it tightly in the middle, cut the loops and trim the ball into a neat, dense sphere. Made in cream and your palette colours, a dozen pom-poms scattered through the branches soften the whole tree like snowfall.
Styling tip: trim ruthlessly — a tight, round pom-pom looks crafted, a shaggy one looks accidental. Mix three sizes and hang them in loose clusters rather than even rows.
Painted, Glittered & Keepsake Ornaments
26. Matte Painted Baubles: Plain Baubles, Designer Finish
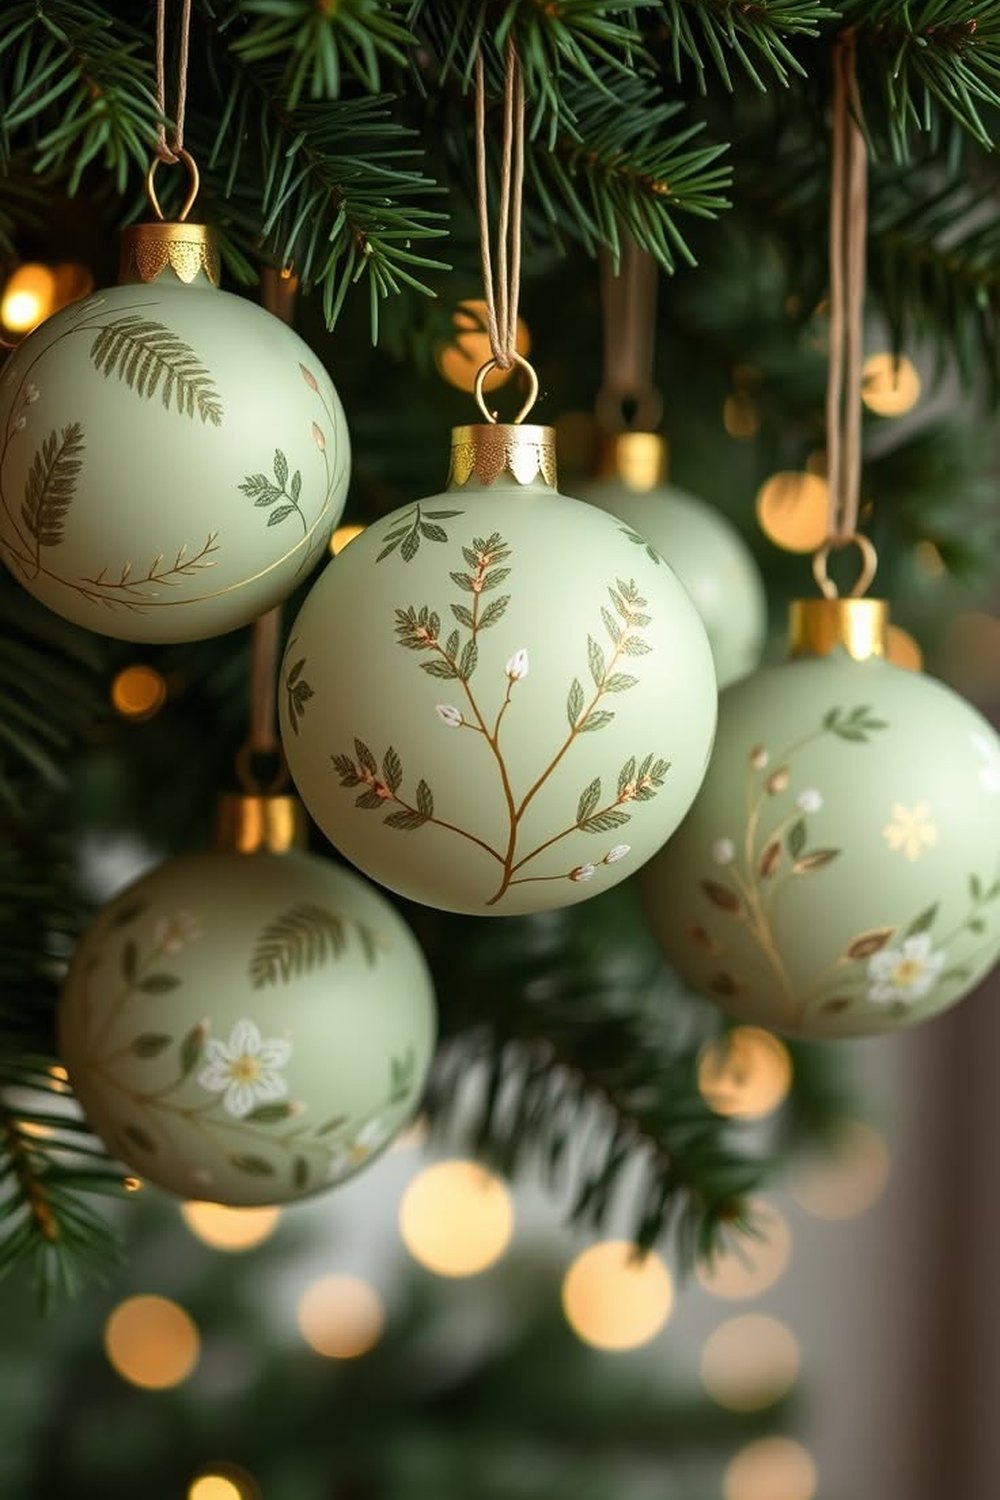
A coat of matte paint turns a bargain multipack into a designer colour story.
Take the plainest baubles you can find and paint them in your palette — cream, sage, forest green, burgundy. Pouring the paint inside a clear bauble gives a smooth, glossy-over-colour finish; painting the outside with chalk or matte paint gives the soft, expensive look that fills this year's most-saved trees.
Styling tip: two thin coats always beat one thick one, and matte is the finish that reads expensive. Rest baubles upside down on skewers in a jar while they dry.
27. Glitter-Dipped Baubles: Sparkle, Kept in Its Place
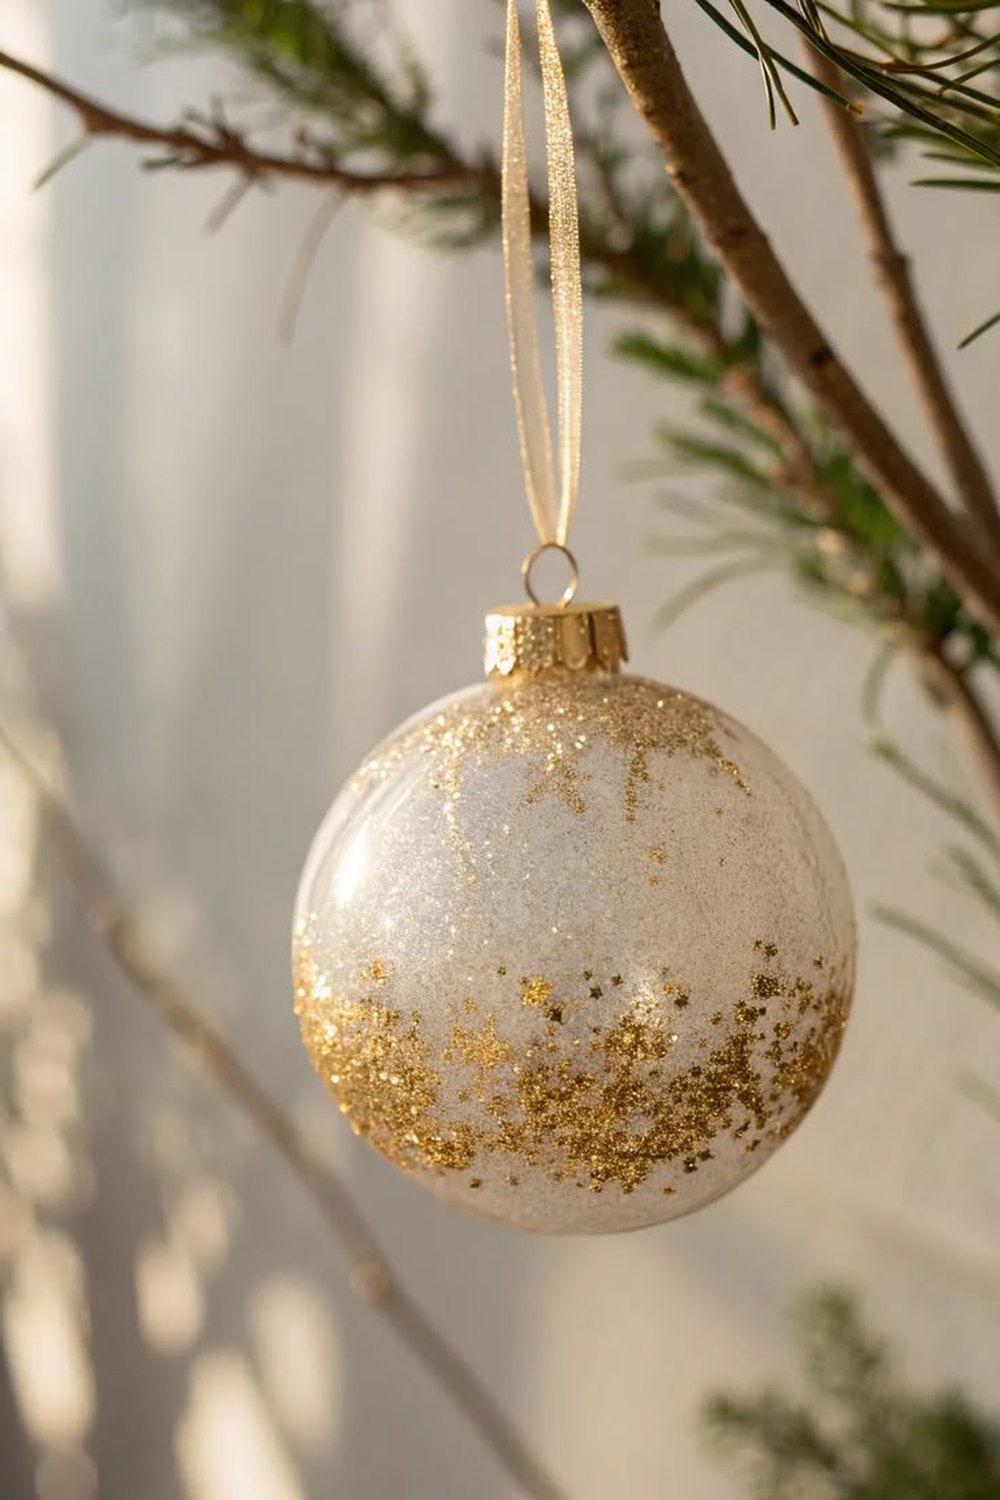
All of the sparkle, exactly where you put it — on the bottom half.
Brush glue over the lower half of a bauble, dip it into fine glitter, and shake off the excess. The clean line where the glitter stops is the whole design: plain glass above, celebration below. They catch the light like dipped champagne glasses and take about a minute each.
Styling tip: fine glitter only — chunky glitter reads crafty, fine glitter reads jewellery. A light mist of spray sealer afterwards keeps the sparkle on the bauble and off your floor.
28. Hand-Lettered Baubles: Names and Dates in a Paint Pen
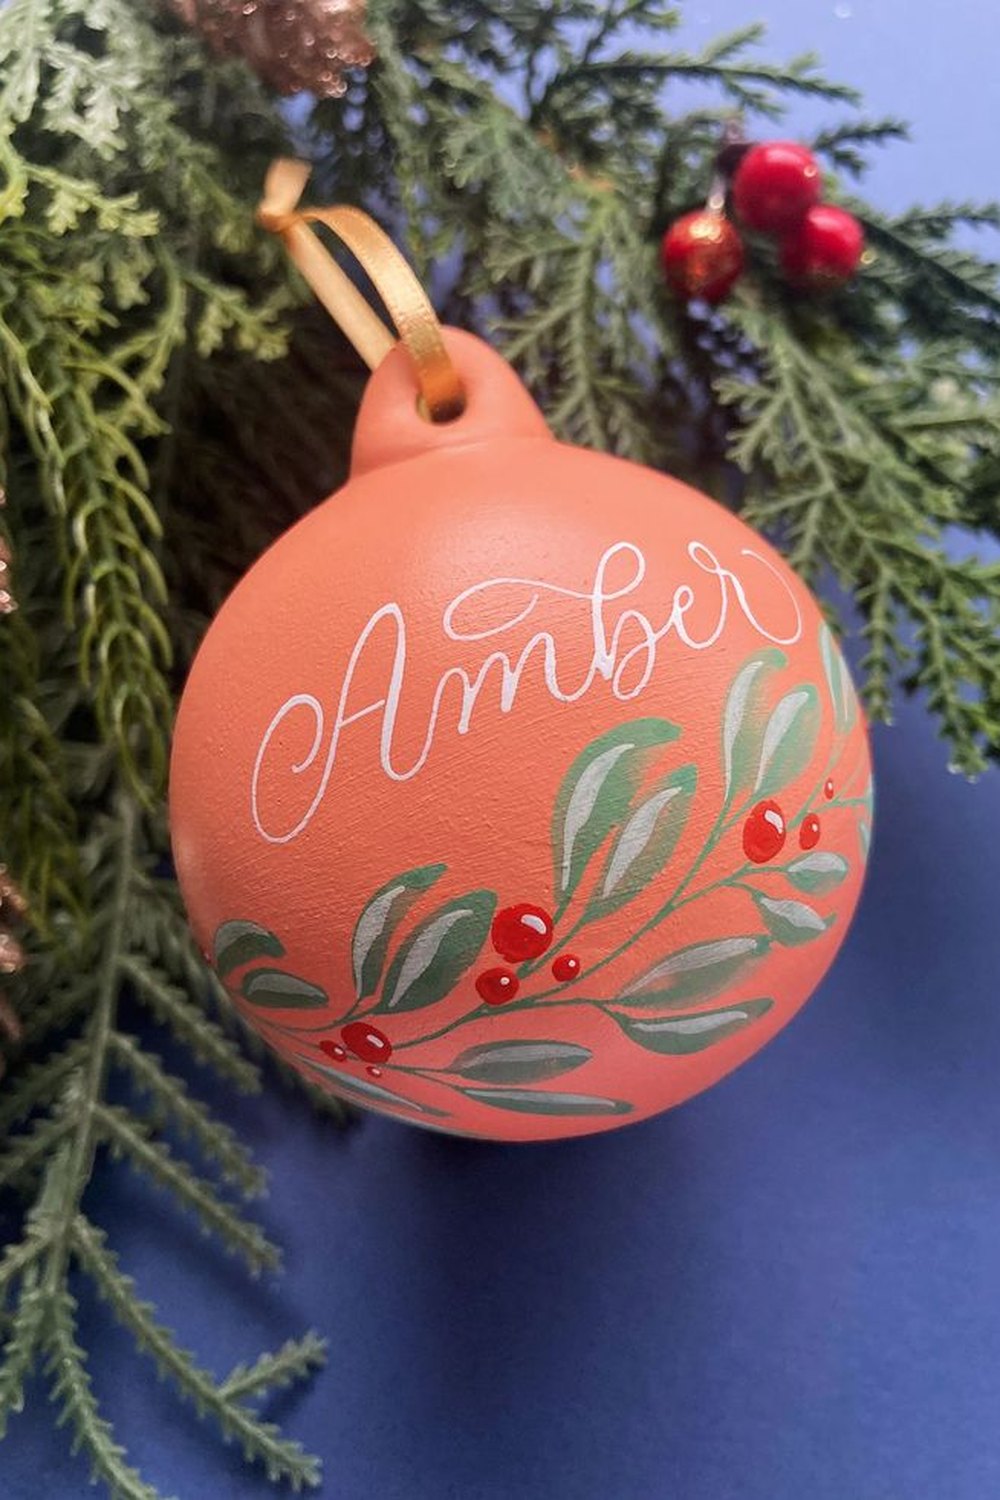
A name, a year, your own handwriting — the one thing no personalisation shop can copy.
Write on matte baubles with a fine paint pen: family names, single words like joy or peace, a baby's name and birth year, the date of a first Christmas in a new home. Practise once on paper, rest your hand on the table, and write slowly, letting the word follow the curve of the ball.
Styling tip: short words work best, and matte baubles take a pen far better than shiny ones. Make one for every person at your table and use them as place settings before they move to the tree.
29. Marbled Baubles: Paint Swirled Inside Glass
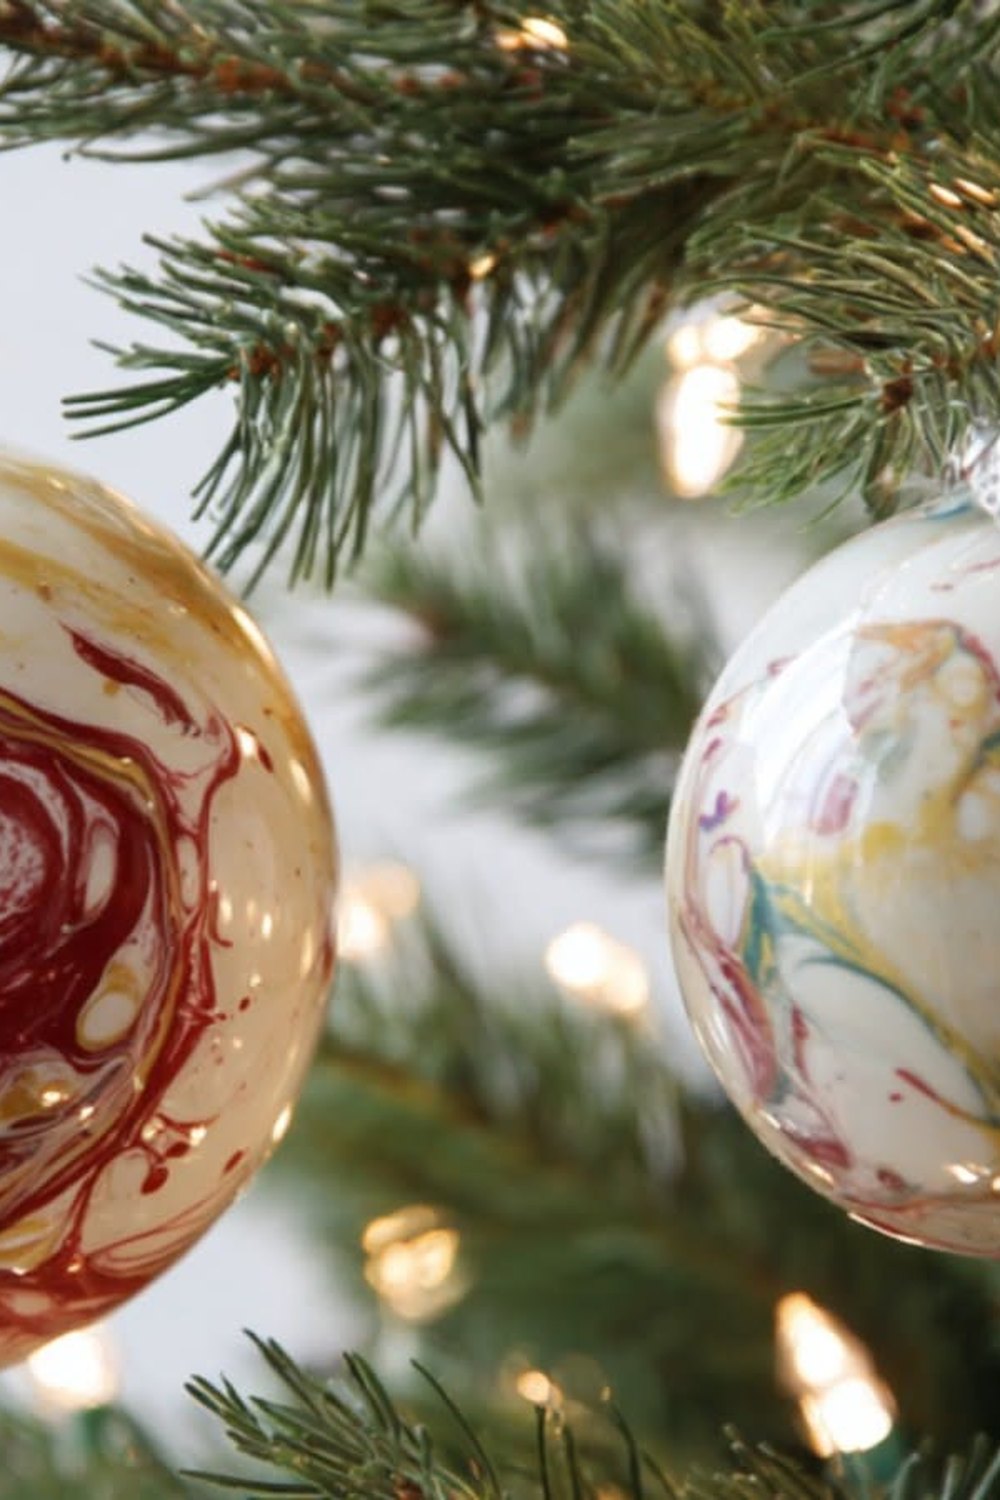
Pour, swirl, drain — and every single one comes out different.
Drip two or three colours of paint inside a clear bauble, then swirl slowly so the colours marble against the glass. Turn it upside down over a cup and let the excess drain overnight. Cream with a vein of gold is timeless; deep green with champagne looks like polished stone.
Styling tip: use less paint than you think — it keeps moving as it dries, and too much turns to mud. No two will match, and that is precisely their beauty.
30. Handprint Keepsakes: Small Hands, Kept Forever
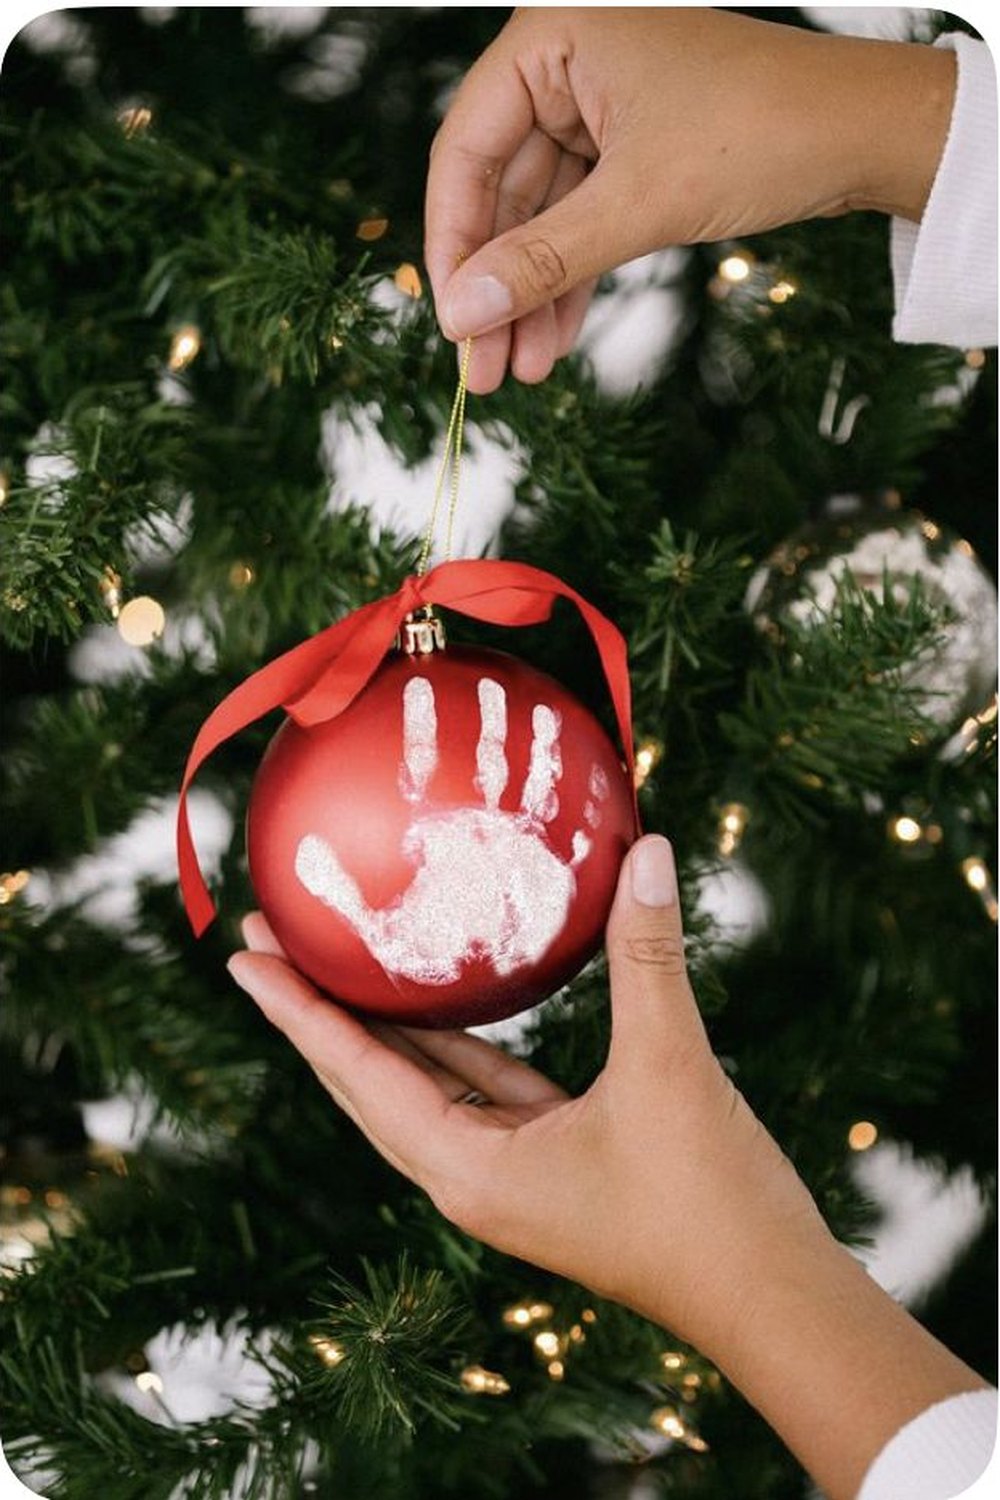
A painted hand, pressed once on a bauble, becomes the ornament nobody would ever trade.
Paint a child's palm with acrylic paint and press it gently onto a large matte bauble — or press the hand into a salt dough disc instead. Add the name and year underneath in a paint pen, and you have the keepsake grandparents ask about first and grandchildren inherit later.
Styling tip: make one per child, every year, and store them in order. On the tree, the growing row of handprints becomes a growth chart your family hangs with love.
31. Paw Print Ornaments: For the Four-Legged Family
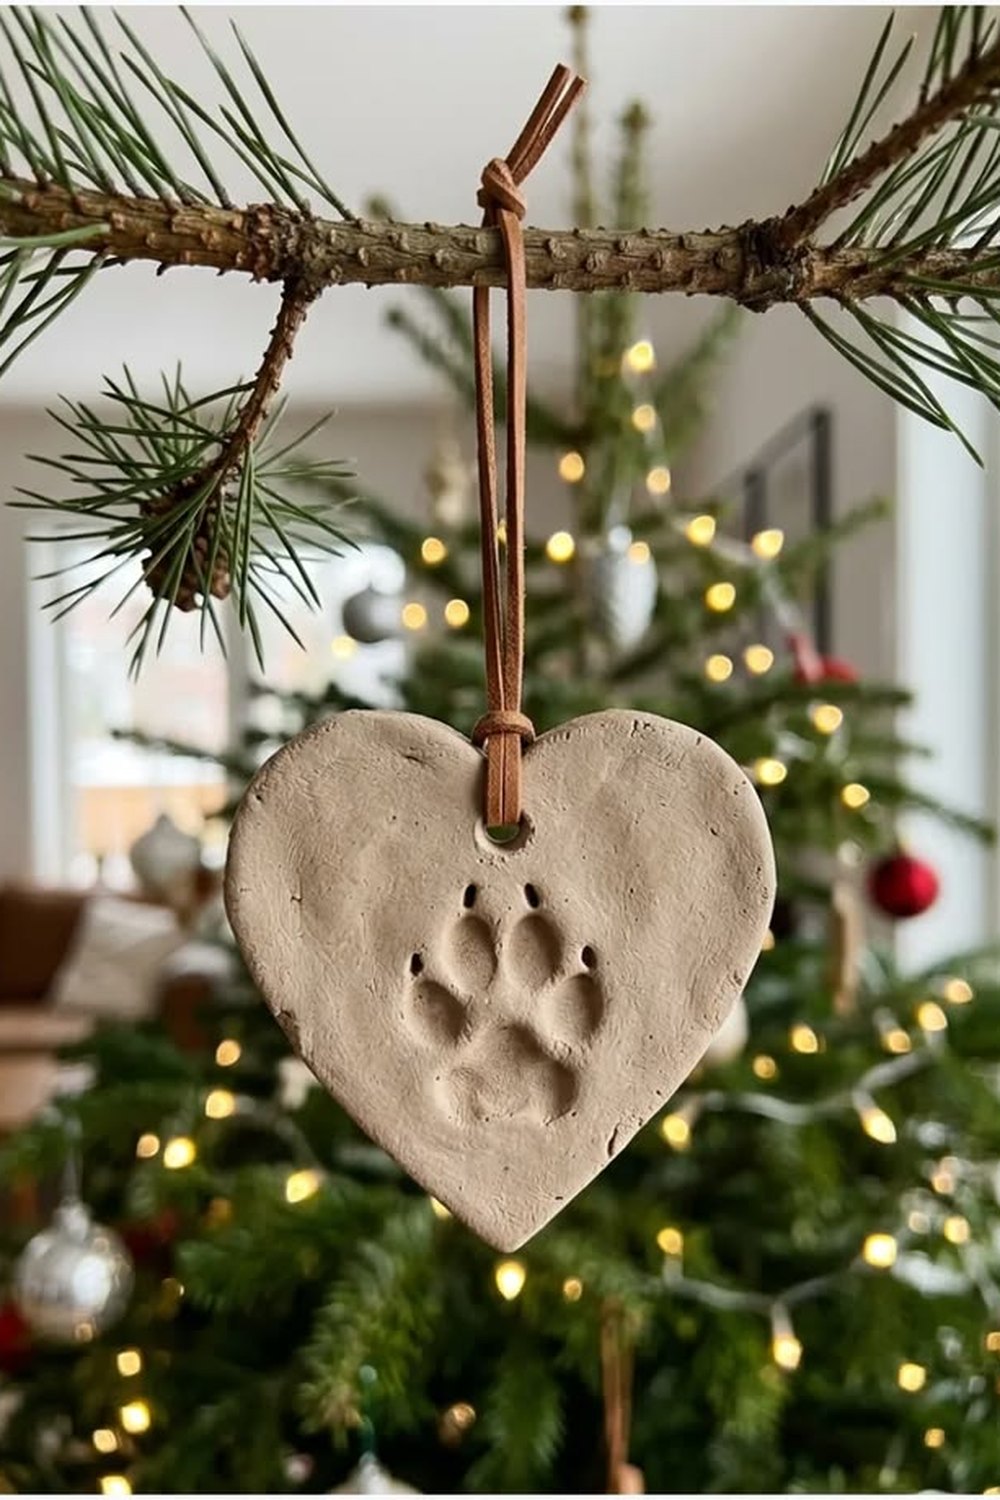
Pets are family — their print belongs on the tree too.
Press a paw gently into a salt dough disc, or onto a bauble with pet-safe, water-based paint, and write the name and year beneath. It takes thirty seconds and one treat, and it gives the four-legged members of the household their rightful place among the family keepsakes.
Styling tip: do it when your pet is sleepy, use one calm press rather than three attempts, and wipe the paw clean straight afterwards. Hang the finished ornament high enough that its inspiration cannot reclaim it.
32. The Annual Keepsake: One Dated Ornament Every Year
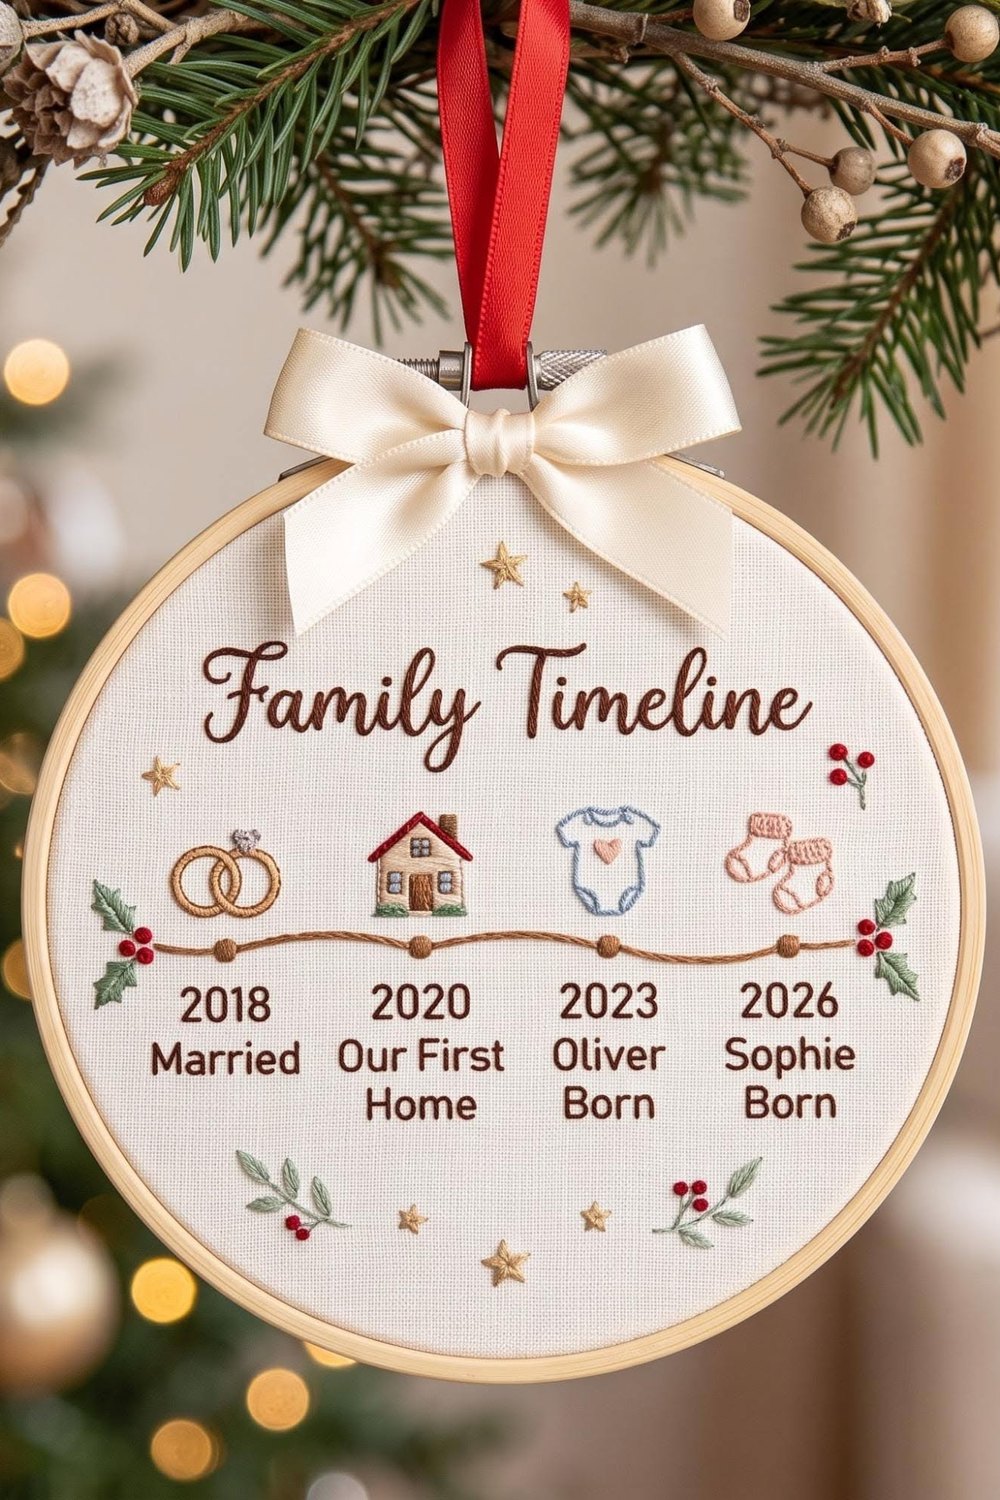
Start this year: one handmade, dated ornament each Christmas, kept forever.
Close your making with a tradition rather than a project. Every year, choose one ornament from this guide — a lettered bauble, a photo bauble, a handprint — make it the year's piece, and mark it clearly with the date. In ten years the tree will not just be decorated; it will tell your family's whole story, one December at a time.
Styling tip: store the annual keepsakes together in one labelled box, in year order. The unboxing becomes its own ritual — the moment Christmas really starts.
Essential Decor Takeaways
- Start with nature: dried oranges, pinecones, cinnamon and sprigs cost almost nothing and look the most expensive of all.
- A clear bauble is a blank canvas — fill it rather than decorating it, with snow, feathers, greenery, photographs or memories.
- One palette makes handmade look designed: choose two colours and one metallic, and let all 32 ideas obey them.
- Repeat one or two techniques across the whole tree instead of attempting every craft at once — repetition reads as a collection.
- Gather supplies once: clear baubles, twine, one bolt of ribbon, a glue gun, paint pens and matte paint cover nearly every project here.
- Mix handmade pieces among calm, plain bought baubles — the contrast is what makes the homemade ones shine.
- Date one ornament every year. The collection you are starting now is the heirloom your family will unpack for decades.
Frequently Asked Questions
What are the easiest diy christmas ornaments for a complete beginner?
Start with the no-skill, no-fail projects: dried orange slices, cinnamon bundles, filled clear baubles, ribbon bows and pom-poms. None of them need special tools or artistic ability, and all of them look impressive on the tree the same evening you make them.
What basic supplies should I gather before I start?
A small kit covers almost everything in this guide: fillable clear baubles, a pack of plain baubles, jute twine, one bolt of wired ribbon, a glue gun, matte acrylic paint, a fine paint pen, and card, felt and yarn in your palette. Add whatever the garden and kitchen offer for free — oranges, cinnamon, pinecones and sprigs.
How do I make handmade ornaments look styled rather than messy?
Three rules do the work. Keep one tight palette across everything you make, repeat each design several times instead of making one of everything, and finish edges properly — trimmed pom-poms, even twine rows, sharp ribbon tails. Grouped on the tree among plain baubles, a repeated handmade design reads as a designer collection.
Which of these ornaments can children help to make?
Salt dough shapes, paper snowflakes and stars, felt ornaments, pom-poms and confetti-filled baubles are all child-friendly, and handprint keepsakes are made for small hands. Keep glass baubles, hot glue and fine glitter as grown-up jobs, and let children own the unbreakable projects — theirs will be the ornaments everyone keeps.
A homemade Christmas is not about perfection — it is about a tree that could only belong to your family. Start with one project this weekend, whether that is a tray of dried oranges or a single bolt of velvet ribbon, and let the collection grow at its own pace, one December at a time. Save your favourite diy christmas ornaments from this list, and follow TheStylingHub on Pinterest for handmade seasonal inspiration all through the holidays.